Three point lighting is the fundamental technique used in visual media—including photography, filmmaking, and video production—to create a three-dimensional look for a subject. By using three separate light sources, a creator can control shadows, define textures, and ensure the subject stands out from the background. Whether you are a YouTuber, a professional cinematographer, or a corporate photographer, mastering the three point lighting setup is the single most important step toward achieving high-end, cinematic results.
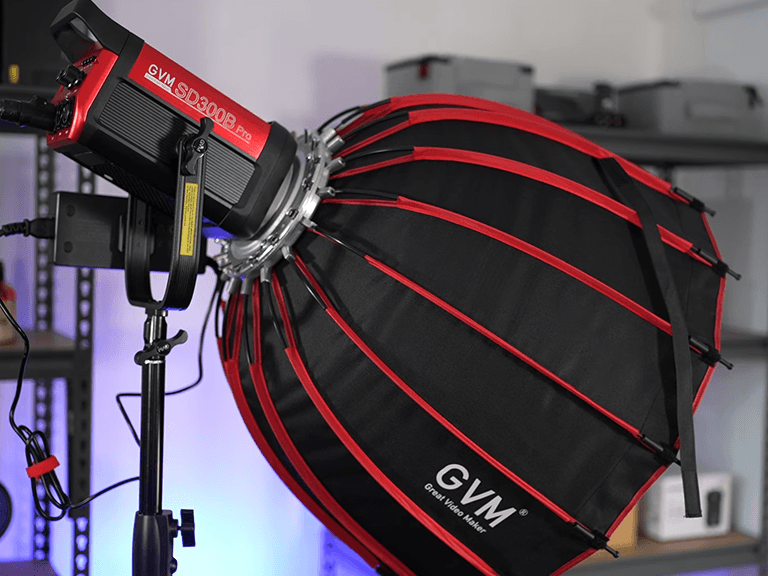
We will take the GVM PRO SD300B as an example, delve into the principles of the classic three-point lighting setup, recommend the best equipment, and demonstrate how to achieve professional lighting effects even in a home or budget-friendly environment.
Was ist Dreipunktbeleuchtung?
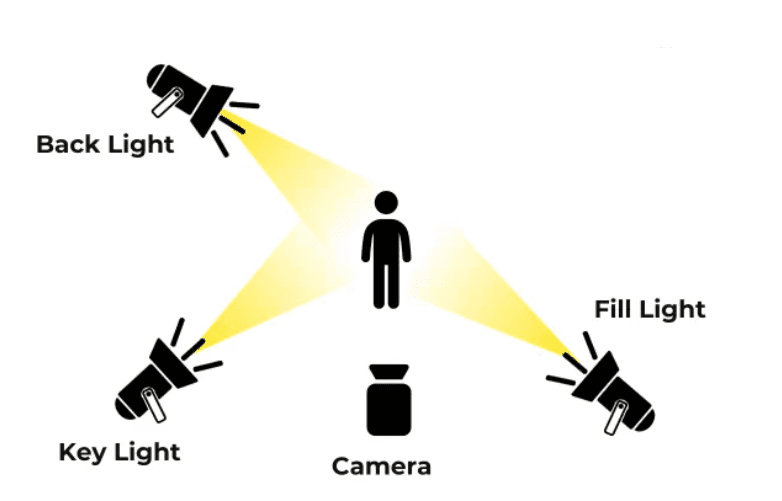
Im Kern, three point lighting is a standard method used in visual media to illuminate a subject while controlling (or eliminating) the shadows produced by direct light. The setup consists of three specific lights:
- Schlüssellicht: This is the primary and strongest light source. It is usually placed at a 45-degree angle to the subject and provides the main illumination, establishing the overall “feel” of the shot.
- Licht auffüllen: Placed on the opposite side of the Key Light, the Fill Light is less intense. Its purpose is to “fill” in the shadows created by the Key Light on the subject’s face, preventing them from being too dark or “moody” (unless that is the intended effect).
- Rücklicht (Felgenlicht): Positioned behind the subject, this light shines on the back of the head and shoulders. It creates a “rim” of light that separates the subject from the background, adding depth and a professional, three-dimensional quality.
By adjusting the intensity and position of these three sources, you can create anything from a bright, “flat” look for a news broadcast to a dramatic, high-contrast look for a noir film.
Was ist der Zweck der Dreipunktbeleuchtung?
The primary purpose of three point lighting is to give the camera a sense of depth that the human eye naturally perceives but cameras often flatten. Here are the specific reasons why this setup is essential:
- Creating Dimension: A single light source often makes a face look two-dimensional. By adding a fill and a back light, you define the contours of the face and the shape of the body.
- Controlling Shadows: Without a fill light, shadows on the “dark side” of a face can become “crushed” (pure black), losing detail. The three-point system allows you to choose exactly how much detail you want to show in those shadows.
- Separation from the Background: In a dark room or a studio with a plain backdrop, a subject can easily “blend” into the shadows. The back light creates a halo effect that ensures the subject pops out.
- Establishing Mood: By changing the “lighting ratio” (the difference in brightness between the Key and Fill), you can communicate different emotions. A 1:1 ratio is bright and happy; a 4:1 ratio is dramatic and mysterious.
Best Three Point Lighting Setup
To achieve the best three point lighting setup, you need high-output, color-accurate, and controllable fixtures. Modern professional setups have moved away from hot, power-hungry tungsten bulbs toward advanced COB (Chip on Board) LEDs.
For a professional-grade setup, the GVM PRO SD300B is an industry favorite. It provides the high intensity required for a Key light, the dimming precision for a Fill light, and the silent operation necessary for clean audio recording.
Professional Choice: GVM PRO SD300B Specifications
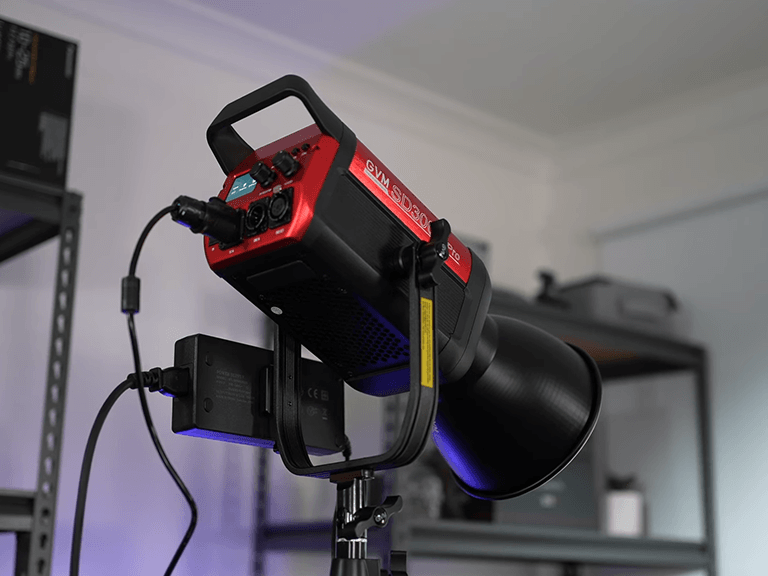
When building the “best” setup, your gear must offer consistency and control. Below are the technical features of the GVM PRO SD300B, a powerhouse designed for professional studio environments.
| Merkmal | Spezifikation |
| Modell | GVM PRO SD300B |
| Lichtintensität | 65,700 lux @ 1 meter |
| Farbtemperatur | 2700K – 6800K (Bi-color) |
| Farbgenauigkeit | CRI/TLCI ≥ 97+ |
| Dimmbereich | 0–100% Stepless Dimming |
| Kühlung | Silent Cooling System |
| Kontrollmethoden | App, On-board, DMX 5-pin, Bluetooth Mesh |
| Spezialeffekte | 12 Cinematic Presets (Lightning, TV, etc.) |
| Light Simulations | 12 Presets (Halogen, Candlelight, Sunset, etc.) |
Why the GVM PRO SD300B is Ideal for This Setup
Die GVM PRO SD300B excels in a three-point configuration because of its High-Fidelity Cinema-grade Light Engine. With a CRI of 97+, it ensures skin tones look natural rather than greenish or washed out. Its 12 Built-in Light Source Simulations allow you to match the lighting to existing environments instantly. For example, if you are shooting near a window, you can set the light to “Daylight” mode; if you are in a cozy room, you can switch to “Candlelight” or “Halogen” with a single click.
Furthermore, its silent cooling means you can place the light close to your subject (essential for soft light) without the internal fan ruining your microphone’s audio.
Three Point Lighting at Home
You don’t need a massive Hollywood soundstage to implement three point lighting. If you are working in a home office or a small bedroom, follow these steps:
- Use Natural Light as Your Key: Position your desk near a window at a 45-degree angle. This provides a beautiful, soft Key light for free.
- Diffuse Your Lights: Home spaces are often small, leading to “harsh” light. Use a softbox or even a white bedsheet to diffuse your LED lights.
- Control the Spill: In small rooms, light bounces off white walls, making it hard to create shadows. Use “black foam core” or dark curtains to stop light from hitting areas where you want shadows.
- Manage the Background: At home, your “back light” is crucial. If your background is a bookshelf or a plain wall, a small LED aimed at the back of your head will prevent you from looking like a “floating head” in the video.
Using the GVM Mobile App with a light like the SD300B is particularly helpful at home. You can stand in front of the camera and adjust your light intensity and color temperature from your phone, rather than constantly running back and forth to the light stand.
Cheap Three Point Lighting
If you are on a strict budget, you can still achieve a professional look by getting creative with your three point lighting tools. You don’t necessarily need $1,000 lights to start; you need to understand the physics of light.
- The Work Light Method: High-wattage LED work lights from a hardware store can serve as a Key light. However, you must cover them with a diffusion material (like a frosted shower curtain) because they are incredibly harsh.
- The Desk Lamp Fill: Use a standard household desk lamp with a “daylight” balanced LED bulb as your Fill light. Since it’s less powerful than your Key, it naturally fills the shadows without overpowering them.
- The “Practical” Backlight: A simple “clamp light” or even a smartphone flashlight (in a pinch) can act as a rim light.
- Reflektoren: You don’t always need three physical lights. You can use one strong Key light (like the GVM PRO SD300B) and a “reflector” (or a piece of white cardboard) on the opposite side to bounce light back onto the face. This effectively turns one light into two (Key and Fill).
Schlussfolgerung
Mastering the three point lighting setup is the fastest way to upgrade the production value of your content. By balancing the Key, Fill, and Back light, you create a professional image that holds the viewer’s attention. While DIY and home solutions are great for starting out, investing in professional-grade equipment like the GVM PRO SD300B ensures your colors are accurate, your setup is flicker-free, and your workflow is efficient thanks to app and DMX controls.
Whether you are aiming for a cinematic masterpiece or a clean YouTube tutorial, remember: it’s not just about having light—it’s about where you put the shadows.