Ask ten different creators what “panel lighting” actually means to them and you’ll get ten slightly different answers — a flat rectangle clipped to a desk, a wall of soft light behind a green screen, a thin slab tucked into a camera bag between shoots. That vagueness is actually the point. Panel lights have become the default lighting choice for such a wide range of creators precisely because the format bends to fit almost any use case, from a cramped apartment bedroom studio to a full commercial set.
But “default choice” doesn’t automatically mean “right choice for you.” Below is a practical breakdown of what actually made panels the go-to format, how they stack up against COB lights when the two get compared honestly, a simple way to figure out what size panel your space actually needs, and where a beginner should realistically start.
Inhaltsverzeichnis
Why Panel Lighting Became the Default Choice for Creators
There’s no single reason panels took over — it’s really three separate advantages that happened to converge at the same time modern LED technology matured.
The physics work in their favor. A flat, wide light source naturally produces softer shadows than a small, concentrated one, without needing a softbox or diffusion attached. That’s a basic principle of light — bigger source, softer shadow — and panels are shaped to exploit it by default, right out of the box.
They fit spaces that weren’t designed for lighting gear. A COB spotlight or a bulky Fresnel needs real clearance to breathe and bounce light usefully. A thin panel can sit inches from a wall, mount flush against a shelf, or slide into a gap between furniture — a meaningful advantage for the huge number of creators now filming out of bedrooms, home offices, and repurposed closets rather than dedicated studios.
They scale down to a beginner budget without scaling down usefulness. Unlike some lighting formats where the entry-level version feels like a compromise, an affordable bi-color panel still delivers the core things that matter — adjustable color temperature, decent CRI, app control — without forcing a creator to “upgrade later” just to get usable results.
Put simply: panels won by being good enough at everything, in a package that fits spaces nothing else does.
Panel Lighting vs. COB Lighting: Myth vs. Reality
The panel-versus-COB debate gets muddier than it needs to be, mostly because a lot of the common wisdom around it is outdated or overstated. Here’s a more honest comparison.
Myth: “COB lights are always brighter.” Reality: Watt for watt, a COB light concentrated into a tight beam will out-punch a panel at distance — that part’s true. But most panels aren’t competing on throw distance; they’re built for close-to-medium range work where their spread matters more than raw punch. Comparing lux at 1 meter without accounting for beam spread is comparing the wrong thing.
Myth: “Panels can’t create dramatic, contrasty lighting.” Reality: A panel’s default character is soft and even, but that’s a starting point, not a ceiling. Add barn doors, move it closer, or narrow your framing, and a panel can absolutely produce harder, more directional light — it just takes more deliberate shaping than a COB light with a focusable lens.
Myth: “COB is always the more ‘professional’ choice.” Reality: Plenty of professional sets run entirely on panels, especially for interviews, product photography, and any scenario where even, flattering light matters more than dramatic shaping. “Professional” describes the result, not the fixture format.
Where COB genuinely wins: distance, focus control, and raw output-to-size ratio when space and weight are tight.
Where panels genuinely win: even coverage without extra modifiers, physical footprint in small rooms, and simplicity for anyone who doesn’t want to learn how to shape a beam.
Neither format is objectively better — they’re solving different problems, and a lot of working creators eventually own both.
How to Size a Panel Light for Your Space
Instead of chasing a wattage number, try this quick sizing check before buying:
Measure your actual shooting distance. Stand where your camera sits and measure to where you (or your subject) sit. Most home setups fall somewhere between 3 and 8 feet — a distance where even a modest 40–100W panel produces plenty of usable light.
Consider whether you’re lighting a person, a product, or a background. A single subject needs far less spread than an entire backdrop. If you’re only lighting a face or a product on a table, a smaller panel goes further than the specs suggest.
Check your ceiling height, not just your floor space. Panels mounted low or close to a subject in a room with a low ceiling can create unflattering upward light bounce. A slim, lightweight panel is easier to angle correctly in tight vertical spaces than a bulkier fixture.
Ask whether you’ll ever need to expand coverage. If there’s a chance you’ll eventually want to light a wider area — a two-person interview setup, a bigger backdrop — a panel with a modular or connectable design saves you from buying a second, unrelated fixture later.
A rough rule of thumb: for a single person at a desk or in a small room, 40–60W of panel output with bi-color adjustment covers the vast majority of real-world situations without needing anything larger.
Best Panel Light for Beginners
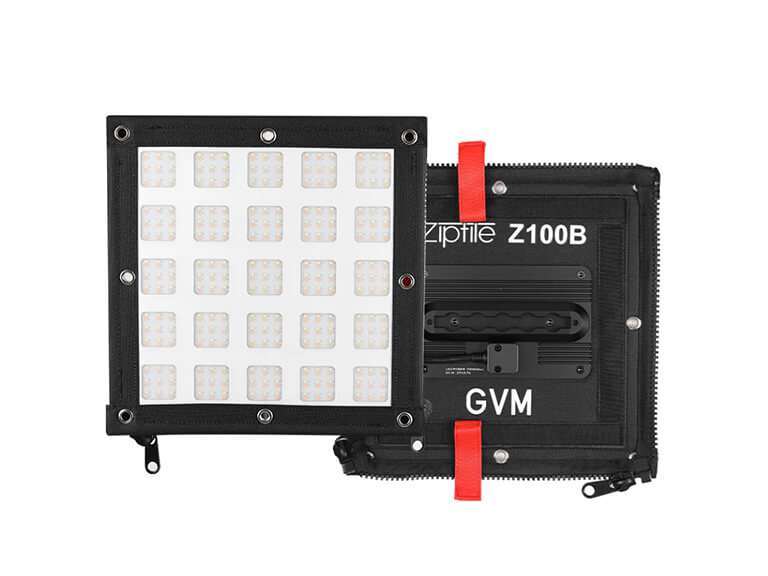
For a first panel light, the priority list should be short: reliable color accuracy, a genuinely wide color temperature range, and a size that doesn’t dominate a small room. The GVM Z100B was built around exactly that brief.
It’s a 100W bi-color panel with a fully tunable 2,700K–6,800K range, giving beginners the flexibility to match warm indoor lighting or cooler daylight without needing a second fixture. Its 12 professional lighting presets — covering everything from tungsten and daylight to candlelight and overcast sky — take a lot of the guesswork out of matching ambient conditions, which matters a great deal when you’re still learning how color temperature actually behaves on camera.
Where the Z100B stands out for space-constrained beginners specifically is its ultra-slim, integrated design — the control box is built directly into the back of the panel, so there’s no separate cable or external unit cluttering a small desk or shelf setup. And because it uses a tool-free zipper connection system, it’s one of the rare beginner-friendly lights that can genuinely scale later — additional Z100B panels zip together into a larger combined light source, meaning a first purchase doesn’t become dead weight once a creator’s needs grow beyond a single panel.
| Merkmal | Specification / Benefit |
|---|---|
| Modell | GVM Z100B |
| Energie | 100W |
| Farbtemperatur | 2,700K–6,800K bi-color, fully tunable |
| Lighting Presets | 12 professionelle Lichtquellenvoreinstellungen |
| Gestaltung | Ultra-slim, integrated control box |
| Erweiterbarkeit | Tool-free zipper connection for multi-panel setups |
| Am besten für | Beginners, small studios, desk setups, film and commercial work |
Schlussfolgerung
Panel lighting didn’t become the default because it’s the most powerful or dramatic format available — it became the default because it’s the format most creators can actually use well in the spaces they actually have. COB lights still win on distance and focus control, but for the close-range, space-limited reality most people are shooting in, a well-chosen panel does more with less friction. Sizing one correctly comes down to your real shooting distance and room, not the biggest wattage number on the page, and a light like the GVM Z100B gives beginners a genuinely capable, scalable starting point rather than something they’ll outgrow in a month.
Ready to find your panel light? Explore the GVM Z100B to see how a slim, bi-color panel fits into your space.