A portable lighting kit is only as useful as the photographer’s understanding of light itself — you can carry the best gear in the world and still misjudge when to rely on it versus when to let the sun do the work.
Before comparing panels, batteries, and mounts, it helps to break down how natural and artificial light actually behave, since that’s what determines whether a kit earns its place in your bag. This guide covers the fundamentals of both, the settings that make artificial light convincing, and how to pick a portable kit that holds up across different shooting conditions.
Inhaltsverzeichnis
What Is Natural Light in Photography
Natural light is any illumination coming from the sun or sky rather than a powered source — direct sun, open shade, an overcast sky, or light bouncing off a nearby wall all count. Its defining trait is that it’s constantly shifting: color temperature, intensity, and direction change throughout the day without the photographer touching a single dial.
That unpredictability is exactly why a portable lighting kit earns its keep. A subject photographed under harsh midday sun looks nothing like the same subject an hour before sunset, and natural light alone can’t be scheduled around a shoot’s actual timeline. Photographers who rely purely on ambient conditions are, in effect, working around the light rather than with it.
What Is Artificial Light Photography
Artificial light photography uses manufactured sources — LED panels, monolights, or continuous fixtures — to control illumination independently of the weather or time of day. The advantage over natural light is repeatability: a well-dialed setup produces consistent results whether you’re shooting at noon, at night, or indoors with no windows.
This matters most for location work, where a photographer can’t control ambient conditions but still needs reliable output. A compact, battery-powered panel effectively turns any location into a controlled set, which is the entire premise behind building a lighting kit that’s actually portable rather than studio-bound.
Künstliche Lichtfotografie-Einstellungen
Getting artificial light to look natural — rather than obviously synthetic — comes down to a handful of settings:
- Color temperature — match the scene rather than defaulting to a fixed value; a tunable range roughly between 2700K and 6800K covers most warm-to-cool scenarios.
- Output level — set relative to aperture and ISO, adjusting as subject distance changes rather than locking in one brightness.
- Modifiers — diffusion or softboxes soften a panel’s output so it falls off more like ambient light.
- Presets — many portable panels include calibrated light-source profiles (tungsten, daylight, HMI, fluorescent) that replicate specific real-world conditions without manual guesswork.
- Power source — battery operation is what actually makes a kit field-ready; AC-only fixtures limit where a shoot can happen.
These settings are also where kit selection matters most — a panel with a narrow color range or no battery option forces compromises the moment you leave a studio.
Fotografie mit natürlichem Licht Definition
More precisely, natural lighting photography is any approach that treats ambient sunlight or skylight as the primary source, shaping it with reflectors, diffusers, or subject positioning rather than generating new light. The photographer’s toolkit here is time of day and angle, not dials or presets.
This distinction matters for kit planning: natural-light shooters often carry lightweight modifiers rather than powered fixtures, while a portable lighting kit is built for the moments when ambient light alone won’t get the shot — overcast interiors, late-day sessions, or venues with poor existing light.
Tipps für natürliche Fotografie
A few habits consistently improve natural light results, and by extension, tell you when a kit needs to step in:
- Shoot during golden hour when the schedule allows — the hour after sunrise and before sunset gives soft, warm, flattering light.
- Use open shade on bright days to avoid harsh shadows and blown highlights.
- Position subjects relative to the light, not just the camera, to control mood through front-, side-, or backlighting.
- Carry a reflector alongside your kit to bounce fill light without powering up a panel unnecessarily.
- Track conditions in advance — overcast skies act as a natural softbox, while a fast-moving shoot schedule is a strong signal to pack a portable fixture as backup.
Building a Portable Lighting Kit That Actually Travels
The gap between “natural light is enough” and “I need backup” is exactly where a portable lighting kit proves its value. The key is choosing a fixture that doesn’t sacrifice control for size — something that packs down easily but still covers the color temperature range and power flexibility a real shoot demands.
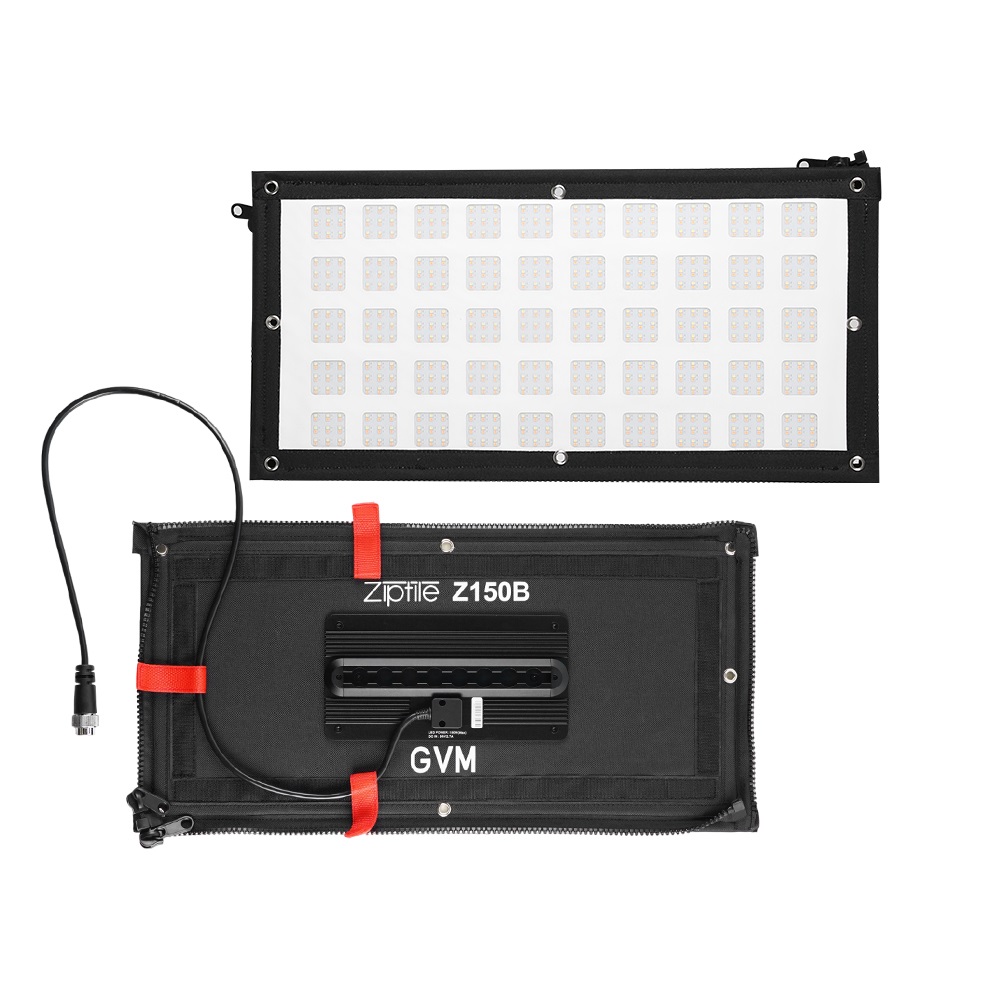
Die GVM Z150B is built around that trade-off. It’s an ultra-thin bi-color panel with a 2700K–6800K range, so it can match daylight or tungsten conditions instead of fighting them, and it runs on either AC power or a V-mount battery — meaning it works equally well plugged in at a studio or carried to a location with no outlets at all.
| Merkmal | Specification / Benefit |
|---|---|
| Farbtemperatur | 2700K–6800K, tunable bi-color output for matching daylight or tungsten conditions |
| Energieoptionen | AC power or V-mount battery — field-ready for locations without outlets |
| Light Source Presets | 12 calibrated presets (Tungsten, Daylight, HMI, Fluorescent) for accurate matching |
| Lichteffekte | 12 built-in cinematic effects with adjustable speed and brightness |
| Build | Ultra-thin, self-supporting frame that mounts directly to standard stands |
| Steuerung | Detachable controller mounts on the panel back for a compact, tool-free setup |
| Modular Design | Multiple panels connect via zipper mechanism to expand coverage on demand |
For anyone building out a kit meant to leave the studio, a fixture that covers this much ground in one thin, battery-capable panel removes the need to carry multiple single-purpose lights.

FAQ
What should be in a portable lighting kit? At minimum, a battery-capable LED panel with a wide color temperature range, a lightweight stand, and a diffuser or reflector for shaping output on location.
Is a portable lighting kit worth it if I mostly shoot outdoors? Yes — even outdoor-focused shooters run into overcast days, indoor venues, or shoots that run past golden hour where a portable fixture fills the gap.
What color temperature range should a portable panel cover? A range from roughly 2700K to 6800K covers most warm-to-cool scenarios, letting one panel match both tungsten and daylight conditions.
Can a small LED panel really replace natural light? Not entirely — but a panel with accurate presets and a wide color range can closely approximate natural conditions when ambient light isn’t available or reliable.
Schlussfolgerung
A portable lighting kit isn’t a replacement for understanding natural light — it’s what fills the gaps that natural light can’t cover on a real schedule. Learning to read ambient conditions tells you when a kit is actually needed, and a flexible, battery-ready panel like the GVM Z150B makes sure that when it is, the results hold up. The strongest kits are the ones that travel light without cutting corners on control.