Good lighting is not simply about making a subject brighter. It determines where the viewer looks, how textures appear, and whether a scene feels natural or carefully constructed. For photographers and video creators, a reliable lighting setup can make a noticeable difference even when the camera and location remain unchanged.
As LED technology has developed, professional lighting equipment has become more accessible. Creators no longer need a complicated studio system to achieve controlled, consistent illumination. An AIO LED video light brings the light source and essential control components together, making professional lighting easier to manage.
Whether you shoot interviews, product videos, portraits, or commercial content, understanding a few basic lighting principles will help you choose equipment that fits your workflow.
目次
Why Professional Lighting Equipment Matters
Natural light can produce beautiful images, but it does not always cooperate with a shooting schedule. Sunlight changes throughout the day, cloud cover affects exposure, and indoor lighting often introduces unwanted color casts.
Artificial lighting gives creators greater control over these variables. You can establish a consistent exposure, shape shadows, and maintain a similar look across multiple takes. This becomes particularly important when recording long interviews, filming product demonstrations, or working on a commercial project that requires visual consistency.
LED lighting also offers a practical advantage: the effect is visible before the shot is recorded. Instead of guessing how a flash will illuminate a scene, you can adjust the light while watching the subject and background in real time.
The key is choosing a fixture with enough output, suitable color control, and adjustments precise enough for the work you do.
What Is an AIO LED Video Light?
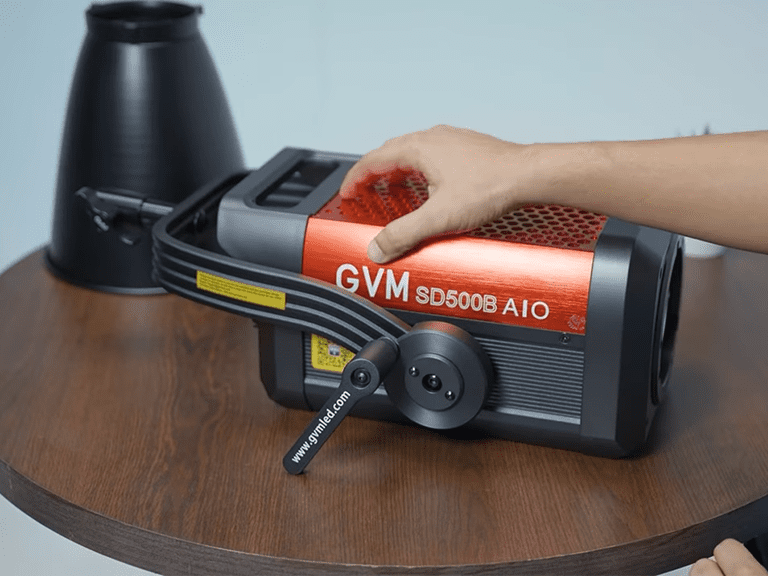
An all-in-one, or AIO, LED video light integrates essential lighting components into a single fixture rather than relying on a separate external control box. Depending on the model, its controller, power management, and other operating components are housed within the light head.
This arrangement reduces the number of separate units that need to be positioned and connected. It can also make the equipment easier to transport, store, and deploy.
AIO lighting is particularly useful for small studios, independent filmmakers, interview crews, and production teams that need professional output without an unnecessarily complicated rig.
However, an integrated design is only one part of the decision. Output, color accuracy, dimming behavior, cooling, and compatibility with light modifiers all affect the final result.
Best for High-Output Professional Lighting: GVM SD500B AIO
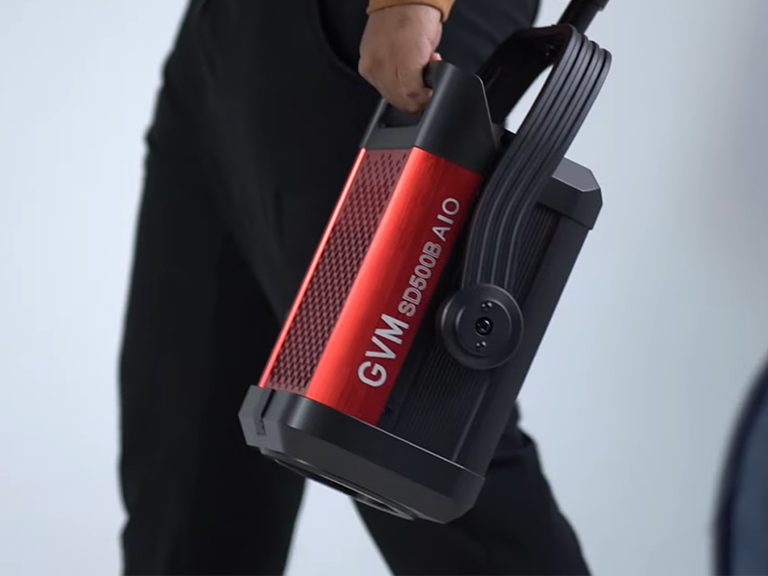
For creators who need substantial illumination without building a complicated lighting rig, the GVM SD500B AIO combines a 500W bi-color LED source with an integrated design and fine brightness control.
Its specifications make it suitable for studio interviews, portrait photography, product shoots, and other productions where a strong, controllable light source is useful.
500W Output for Demanding Shooting Conditions
The SD500B AIO provides 500W of rated power consumption. With its standard reflector, the manufacturer lists a maximum illuminance of 227,040 lux at 1 meter. This figure represents a specific measurement configuration, rather than the brightness you should expect at every distance or with every modifier.
Why does output matter in practice?
A stronger source gives you more options when shaping light. You can position the fixture farther from the subject, work with diffusion, or illuminate a larger area while retaining useful brightness. For commercial video and product photography, that extra headroom can make it easier to maintain a consistent exposure without pushing the camera settings unnecessarily.
An Integrated Design That Simplifies Setup
Traditional high-output lighting systems may require a separate control or ballast box, along with additional cables and mounting considerations. An integrated fixture brings essential components into the light head, reducing the number of separate pieces to arrange.
The SD500B AIO uses this approach and operates from AC power. Its controller is built into the fixture, so there is no separate external control box to position during setup.
This is especially helpful when working alone or moving between locations. Less time spent organizing equipment means more time available for testing angles, adjusting modifiers, and refining the composition.
Bi-Color Control and 0.1% Dimming
The SD500B AIO offers an adjustable color temperature range of 2700K–6800K, covering warm indoor tones through cooler daylight-style illumination. Its CRI and TLCI ratings are 97+, supporting accurate color reproduction for subjects where skin tones and product details matter.
Brightness can be adjusted from 0% to 100% in 0.1% increments. Such fine adjustment is valuable when a scene is already close to the intended look and only a small exposure correction is needed.
Rather than repeatedly moving the light stand or changing the camera aperture, you can fine-tune the output directly. The fixture also supports app-based control, providing another way to adjust settings during production.
| 機能 | Specification / Benefit |
| 力 | 500W rated power consumption |
| Maximum illuminance | 227,040 lux at 1m with standard reflector, according to manufacturer |
| 色温度 | 2700K–6800K bi-color |
| Color accuracy | CRI 97+ / TLCI 97+ |
| 調光 | 0–100% in 0.1% increments |
| Design | All-in-one integrated fixture |
| Best suited for | Interviews, product videos, portraits, and studio production |
How to Shape Light for Better Results
Even a powerful fixture will not automatically produce a polished image. The direction, size, and distance of the light source all influence the final appearance.
Use a Softbox for Softer Light
A bare light source often creates relatively defined shadows and strong highlights. Adding a softbox increases the apparent size of the source, producing softer transitions between light and shadow when positioned appropriately.
For portraits and interviews, try placing the softbox slightly above eye level and to one side of the subject. This creates dimension across the face without making the lighting feel flat.
A larger softbox placed closer to the subject generally produces softer light, although the effect also depends on the source’s apparent size from the subject’s position.
Control the Distance
Moving a light closer can increase the illumination on the subject and make the source appear larger. Moving it farther away can help create more even illumination across a wider area, but usually requires more output to maintain the same exposure.
When filming a product, small changes in distance may also alter the reflections visible on glossy surfaces. Adjust the light while observing the actual object rather than relying solely on the camera’s exposure meter.
Separate the Subject From the Background
A common mistake in small studios is illuminating everything equally. This can make an image look flat, even when the exposure is technically correct.
Start with the key light on the subject. Then assess the background separately. Depending on the scene, you may need a lower background level, a subtle rim light, or simply a change in the key light’s direction.
The objective is not to make every part of the image bright. It is to create a deliberate visual hierarchy.
結論
Choosing the right AIO LED video light means looking beyond wattage alone. Output determines how much lighting flexibility you have, color temperature helps you match the environment, and dimming precision makes it easier to refine the final image.
The GVM SD500B AIO brings these considerations together in a 500W bi-color fixture with an integrated design, a 2700K–6800K color temperature range, and 0.1% brightness adjustment. For creators who need strong output without adding unnecessary complexity to their setup, it offers a practical option for professional studio work.
Ultimately, good lighting is a process of observation and adjustment. Learn to control direction, distance, softness, and contrast first. The equipment becomes far more useful when every adjustment has a purpose.