Mastering studio lighting is crucial for professional product photography. This guide tackles common problems like harsh shadows, reflections, and color casts. We’ll also recommend a versatile lighting solution to get you started.
Introduction
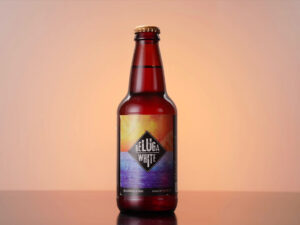
Let’s face it: in the world of product photography, your lighting is your silent salesperson. It’s not just about illuminating your subject; it’s about sculpting it, highlighting its texture, and forging an emotional connection with the viewer. If your product photos look…well…amateur, despite a professional camera and editing software, the culprit is often subpar studio lighting.
This isn’t a basic overview. We’re diving deep into the challenges experienced product photographers face and providing nuanced solutions to elevate your work. Whether you’re shooting jewelry, electronics, apparel, or anything in between, understanding and resolving common lighting problems is the key to achieving truly professional results.
But before we delve into the common pitfalls, let’s talk about a great all-around lighting option to get started.
Product Recommendation: The GVM PRO-SD300B – A Versatile Powerhouse
For product photographers seeking a reliable and versatile lighting solution, the GVM PRO-SD300B Bi-Color Spotlight is a strong contender. This LED light offers a compelling combination of power, color accuracy, and user-friendly features, making it a solid choice for various product photography scenarios.
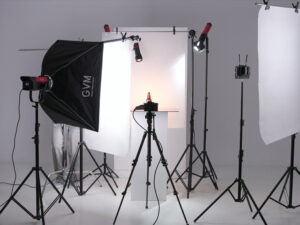
Key Features:
- Bi-Color Adjustment: Easily adjust the color temperature from warm to cool to match ambient light or create a specific mood.
- High CRI/TLCI: With CRI and TLCI ratings above 97, expect accurate color rendering, ensuring your product photos faithfully represent the true colors of your subjects.
- Bowens Mount Compatibility: Offers seamless integration with a wide range of light modifiers, giving you creative control over light shaping.
- Precise Dimming Control: Fine-tune light intensity with accurate dimming, essential for achieving subtle lighting effects and avoiding overexposure.
- User-Friendly Interface: Intuitive controls and a clear display make it easy to adjust settings and monitor performance.
Why mention this early? Many photographers struggle to identify what to buy, and this is a solid starting point for anyone looking to create a professional lighting setup. Now, let’s delve into common lighting challenges and how quality equipment helps solve them.
Problem #1: The Curse of Harsh Shadows
Harsh shadows are the bane of a product photographer’s existence. They can make your product appear flat, cheap, and unappealing. Instead of subtly defining edges and textures, they create jarring contrasts that distract the viewer.
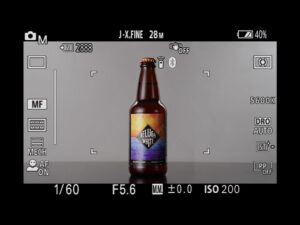
Why They Happen: Harsh shadows are almost always caused by direct, undiffused light. Think of a bare bulb – all its power concentrated in a single, unforgiving point. Smaller light sources relative to the product size amplify the effect.
- The Expert Solutions:
- Embrace Diffusion: Diffusion is your best friend. Softboxes and umbrellas are the classic choices, but don’t underestimate the power of simple diffusion panels. The larger the diffusion area, the softer the light and the more gradual the transition between light and shadow. Experiment with different diffusion materials to find what works best for your specific products. You can also use tracing paper for smaller items.
- Think Big(ger): The size of your light source matters. A tiny speedlight, even diffused, won’t provide the same results as a large octabox. Consider upgrading to larger softboxes or investing in LED panels that can be ganged together for a larger, more even light source. Quality lighting with Bowens Mounts lets you change diffusers easily.
- Master the Art of Fill Light: Don’t rely solely on one light source. Fill lights are essential for opening up shadows and revealing detail. White reflectors are a cost-effective solution, but a dedicated fill light, positioned at a lower power than your main light, offers greater control. Placement is crucial; experiment with angles to find the sweet spot that gently lifts the shadows without creating a second set of shadows.
- Distance is Your Ally: Moving the light source further away from the product reduces the intensity of the light and softens shadows. Of course, inverse square law comes into play, so you will lose some light. Be prepared to bump up your light power to compensate.
Problem #2: Taming Unwanted Reflections
Ah, the dreaded reflection. Highly reflective surfaces like jewelry, glassware, and polished metal can turn your product photos into a funhouse mirror of distractions.
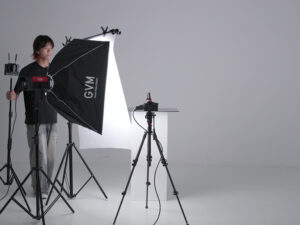
- Why They Happen: Shiny surfaces act like miniature mirrors, reflecting light sources, background elements, and even you back into the camera.
- The Professional Approach:
- Polarization is Your Secret Weapon: Invest in high-quality polarizing filters for both your lens and your light sources. These filters block light waves vibrating in certain directions, effectively reducing or eliminating reflections. Experiment with rotating the filters to find the optimal angle for reflection reduction.
- Strategic Light Placement: Sometimes, a simple change in light position can make all the difference. Try positioning your light source at a sharper angle to the product. This can bounce reflections away from the camera’s view.
- The Light Tent Solution: A light tent creates a completely controlled, diffused environment. It’s like a miniature studio within a studio. While light tents are effective, ensure you still control your light inside of them for the best outcome.
- Black Flags (and a bit of ninja skill): “Flags” or black cards are invaluable for blocking light from hitting reflective surfaces. Position them strategically to eliminate unwanted highlights without darkening the entire image.
- Dulling Agents: A Last Resort: For some situations, a matte spray can reduce shine. Always test the spray on an inconspicuous area first, and use it sparingly.
Beyond filters and angles, the quality of your light also plays a crucial role. Lights offering precise control over light intensity are ideal, allowing you to subtly shape the light and minimize unwanted reflections. The ability to adjust the light in tiny increments (down to 0.1%!) is particularly helpful when working with highly reflective surfaces.
Problem #3: Battling Uneven Lighting and Hotspots
Uneven lighting and hotspots can ruin an otherwise great product photo. Hotspots create overexposed areas that lack detail, while uneven lighting can leave parts of the product in shadow.
- What Causes It: Often, it’s a single light source that’s either too close or not properly diffused.
- The Pro Fix:
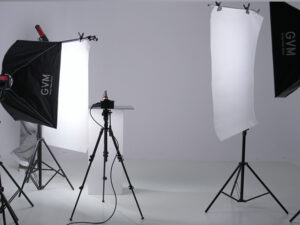
- Multiple Lights = Balanced Light: Using a single source is great in certain conditions but ultimately limiting. Employing at least two, if not three, separate lights can deliver balanced illumination. Your main light (key light) provides the primary illumination, while a fill light helps to reduce shadows. A third accent light can add sparkle and highlight specific features.
- Distance & Diffusion – A Winning Combination: Moving lights slightly further back and increasing diffusion on them are two simple techniques that will reduce uneven lighting. The further away a light is, the more evenly it will light an object, even if there is still some light falloff.
- Fill it Up: Don’t have a second light? No problem. Simply take a reflector and bounce your main light back into the shadowed area.
- Dial it In: Once you’ve achieved the basics of proper lighting, it’s time to dial it in. A few minor power adjustments to each light source can drastically change the quality of light.
Speaking of control, many newer lighting units provide dimming rate curves, commonly used in the film industry, allowing for adjustments that create your desired scene and atmosphere. The use of multiple lights and quality adjustments gives you consistent and even light.
Problem #4: Eradicating Color Casts
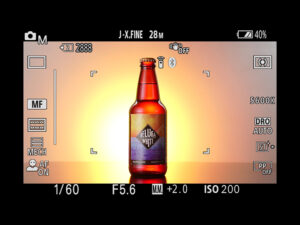
- Why Color Casts Appear: Mixing light sources with different color temperatures is a common culprit. Fluorescent lights, incandescent bulbs, and even ambient daylight have different color characteristics, which can contaminate your images. Reflections from colored surfaces can also introduce color casts.
- The Strategic Solutions:
- Maintain Lighting Consistency: The easiest solution is to use lights with the exact same color temperature. Stick to daylight-balanced LEDs for most product photography.
- Master White Balance: Learn to set your camera’s white balance accurately. A gray card is your best friend here. Use it to take a reference shot, then use that reference to set the white balance in your camera or in post-processing.
- Avoid Colored Reflections: Be mindful of your surroundings. Remove any colored objects that might reflect onto your product.
- Gel it Up: Correction gels can be used to balance the color temperature of your lights and balance to what you prefer.
- Post-Processing Precision: Even with the best lighting setup, you might still need to fine-tune the colors in post-processing. Use your photo editing software to remove any remaining color casts and ensure accurate color representation.
Maintaining consistent color temperature across all your light sources is crucial. Units boasting bi-color capability, with high CRI and TLCI ratings, allow you to fine-tune the color temperature to match ambient light or create a specific mood. Their light effects modes also help save time when you need a specific light source. Plus, stable brightness and CCT over long periods mean you can trust its color accuracy throughout a shoot.
Bonus Tip: Unleash the Power of Post-Processing
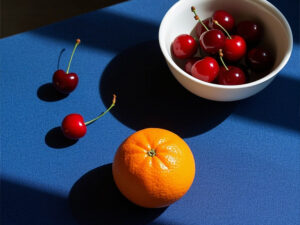
Let’s be clear: post-processing is not a substitute for good lighting. However, it’s the finishing touch that can take your product photos from good to exceptional. Use post-processing to fine-tune colors, sharpen details, remove blemishes, and optimize the image for web or print.
The Pro Equipment List (Quick Hits)
- Softboxes & Umbrellas: Essential for diffused lighting. Invest in various sizes.
- Reflectors: White, silver, and gold for different fill light effects.
- Polarizing Filters: Absolutely crucial for reflective products.
- Light Tents: Great for smaller items, but you still need to control the light inside.
- Gray Card: Non-negotiable for accurate white balance.
- LED Panels (Daylight Balanced): The workhorse of modern product photography.
- High-Quality Monitor: Accurate color representation is a must for editing.
- Photo Editing Software (Photoshop, Lightroom): Industry-standard tools for post-processing.
Conclusion
Mastering studio lighting for product photography is a journey, not a destination. There will be times when you feel like you’re battling the laws of physics. But by understanding the common problems and applying the solutions outlined in this guide, you’ll be well on your way to creating product images that are not only visually stunning but also drive sales and enhance your brand.
Don’t be afraid to experiment. Try different lighting setups, explore new techniques, and find what works best for your specific products and your creative vision. If you are unsure of where to start, invest in quality lighting equipment and accessories to set you on the right path. And remember, the best product photos are not just well-lit; they tell a story and connect with the viewer on an emotional level.
Now, it’s your turn! What are your biggest lighting challenges in product photography? Share your questions and experiences in the comments below. Let’s learn and grow together!

