In the realm of photography and filmmaking, supplemental lighting is absolutely crucial. It’s not just about illuminating your subject; it’s a key factor that determines the success of your work. The right photography lighting can significantly enhance image quality, ensure accurate color reproduction, and create a captivating atmosphere. Because different types of photography – portrait, product, video – have vastly different lighting requirements, finding the best studio lighting tailored to your needs is like holding the key to unlocking your creative vision.
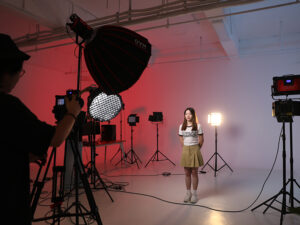
So, what makes a photography light “the best”? There’s no absolute answer; it depends entirely on your shooting scenario and creative goals. The best studio lights for photography are those that deliver optimal light quality in a specific context, empowering you to achieve your artistic intent. Let’s delve into the key factors that make a lighting solution a high-quality, perfectly suited choice.
Core Elements Determining the Quality of Photography Lights
- Light Source Category
- Strobes (Flash): Strobes emit a high-intensity burst of light in a short timeframe, ideal for freezing fast motion, like capturing a sports athlete’s winning moment or splashing water droplets. Their color temperature is usually stable around 5500K – 6000K, close to natural light, which aids in accurate color rendering. However, strobes require the photographer to precisely match camera parameters, presenting a learning curve for beginners. For example, in a fashion photoshoot in a studio, strobes paired with softboxes provide even, powerful light, perfectly showcasing the texture and color of the model’s clothing.
- Continuous Lights: Continuous lights provide stable and constant illumination, allowing photographers to observe the lighting effect in real-time and easily adjust shooting angles and light positioning. Therefore, they are widely used in video shooting, ensuring consistent light levels and avoiding flickering. Take, for example, the filming of a tutorial video; continuous lights ensure the instructor’s face remains evenly lit and the video remains stable. However, continuous lights have relatively limited brightness, often requiring multiple units to be used together for larger-area illumination.
- LED Lights: LED lights offer significant advantages in energy efficiency and longevity, saving considerable electricity costs and reducing the hassle of frequent replacements. They have a high Color Rendering Index (CRI), accurately reproducing the colors of objects, and they also support color temperature adjustment, from warm, cozy light to cool, crisp light, adapting to various shooting requirements. For example, when shooting food photography, high-CRI LED lights can make the colors of the food look tempting; when shooting vintage-style photos, warm yellow-toned LED lights can create a nostalgic atmosphere. In addition, LED lights are compact and lightweight, making them easy to carry and install, suitable for both indoor studios and outdoor shoots.For a deeper dive into technical specifications and comparative reviews of various brands, you can refer to this comprehensive studio lighting resource to help you make an informed decision.
- Power and Brightness
- A photography light’s power rating determines its light output; generally, the higher the wattage, the brighter the light. In practical shooting, you need to select the appropriate wattage based on the size of the shooting environment. Large studios require higher-power lights to evenly illuminate the entire scene, while smaller studios can opt for lower-power options. Lights with adjustable brightness are also more versatile, meeting diverse shooting needs. When shooting high-key photos, you need brighter light to create a bright atmosphere; when shooting low-key photos, you need dimmer light to create a somber mood.
- Color Rendering Index (CRI)
- For shooting subjects where color accuracy is crucial, like product or portrait photography, a high CRI is essential. Typically, the CRI of photography lighting should be above 90; if it can reach 95 or even higher, it ensures that the colors of the subject are rendered accurately, vividly, and naturally in the photographs, avoiding color distortion.
- Color Temperature
- Different shooting scenarios and subjects require different color temperatures to create the appropriate atmosphere. In portrait photography, color temperatures around 5000K – 5600K are commonly used to reproduce natural skin tones; in product photography, a white light of around 6500K might be needed to accurately present the product’s colors and details. Photography lights with adjustable color temperature are more flexible and practical, allowing you to switch between warm and cool light based on your shooting needs, meeting a variety of creative requirements.
- Light Evenness
- High-quality photography lights should emit light that is as even as possible within the illumination range, avoiding situations where the center is too bright, the edges are too dark, or the light is uneven. Even light ensures that all parts of the subject receive the same degree of illumination, which helps to accurately represent the shape, texture, and color of the object, reducing the amount of post-editing work. When selecting photography lights, you can assess their light evenness by observing the light spot on a white wall or flat surface.
- Heat Dissipation Performance
- For higher-power photography lights, good heat dissipation performance is essential. Prolonged use of high-power lighting generates a lot of heat; if heat dissipation is poor, it will not only affect the lifespan and stability of the lighting but also pose a threat to the safety of the shooting equipment and personnel. Therefore, choose photography lights with built-in cooling fans, heat sinks, or overheat protection functions.
- Portability and Mounting Method
- If you frequently need to shoot outdoors or need to adjust the position of the lights flexibly, then the portability of the photography light becomes particularly important. Lightweight and compact lights are easier to carry and move. At the same time, the mounting method of the photography light should also be flexible and stable. Common mounting options include light stand mounting, hot shoe mounting, and magnetic mounting, which can be selected based on your shooting equipment and habits.
- Brand and After-Sales Service
- Photography lights from well-known brands have better guarantees in terms of quality and after-sales service. These brands typically have stricter standards in R&D, production processes, and quality control, resulting in products with higher stability and reliability. Before purchasing, you can refer to other photographers’ reviews and experiences to understand the advantages and disadvantages of different brands and models, and also pay attention to the brand’s after-sales service policies.
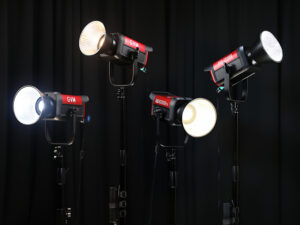
The Best Photography Lighting Under $250: GVM PRO SD200B – A Top Pick
Without a doubt, if you’re looking for a high-performing, best studio lights for photography within a $250 budget, the GVM PRO SD200B is a highly recommended option. It not only delivers powerful illumination up to 34,200 Lux @ 1 meter but also offers an adjustable color temperature range from 2700K to 6800K and an ultra-high CRI/TLCI rating of 97+, ensuring that your photos and videos have true-to-life, vivid colors.
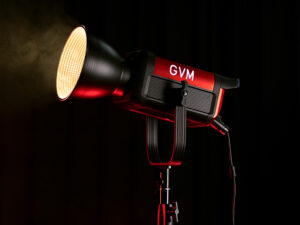
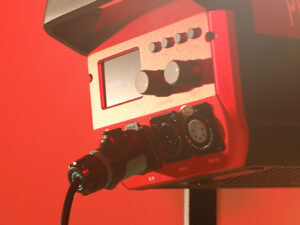
The advantages of the GVM PRO SD200B extend beyond just that. It features 12 built-in special lighting effects and 12 common lighting modes, making it easy to handle various shooting scenarios and saving you valuable setup time. Whether you’re doing video recording, wedding shoots, portrait photography, or product photography, it provides just the right lighting effect. Even better, it supports intelligent APP control, Bluetooth networking, and DMX control, making your lighting setup more flexible and convenient. The 200W high-power output, combined with an intelligent algorithm, ensures that the brightness remains consistent across different color temperatures and color settings, providing a stable and reliable light source. Finally, the sturdy and durable aluminum alloy body and efficient heat dissipation system also guarantee its stability and long service life.
GVM PRO SD200B Photography Lighting: Product Overview
| Feature | Description | Advantage |
|---|---|---|
| Brightness | Up to 34,200 Lux @ 1 meter | Provides ample light for various shooting environments; easily meets different shooting needs. |
| Color Temperature | 2700K – 6800K Adjustable | Adjust warm and cool color temperatures according to scene requirements, creating the ideal lighting effects; enhances shooting flexibility. |
| Color Rendering | CRI 97+ & TLCI 97+ | Accurately reproduces the colors of objects, ensuring that your photos are true to life and vivid; improves post-editing efficiency. |
| Effects | 12 Special Lighting Effects (Lightning, Candles, TV, Fireworks, etc.) / 12 Lighting Modes | Quickly select the appropriate lighting effects, saving setup time; provides more possibilities for your creativity. |
| Control Method | Intelligent APP Control (iOS & Android), Bluetooth Networking, DMX Control (8-bit & 16-bit) | Multiple control methods, flexible and convenient; can be linked with other GVM devices for more complex lighting control; meets professional needs. |
| Power | 200W | Sufficient brightness, suitable for various shooting scenes; intelligent algorithm ensures consistent brightness. |
| Mount & Adjustment | Bowens Mount, U-Shaped Bracket (360° Adjustable) | Compatible with a variety of accessories, strong expandability; flexibly adjust the irradiation angle, convenient for lighting. |
| Durability & Cooling | Aluminum Alloy Body, Built-in Fan & Active Cooling System | Sturdy and durable, suitable for daily use; effective heat dissipation, prolongs service life, ensures stable performance. |
| Stability | Brightness, color temperature, and color rendering remain stable during long-term operation. | Guarantees consistent shooting effects over time, avoiding problems caused by changes in lighting. |
In short, the GVM PRO SD200B is a comprehensive and feature-rich best studio lighting solution within a $250 budget.
Lighting Accessories – Give Your Lighting a Boost
- Diffusion Tools:
- Softboxes, umbrellas, eggcrate grids, and other diffusion tools can effectively soften the light, reduce shadows, and make the light more gentle and natural.
- Control Tools:
- Barndoors, honeycombs, snoots, and other control tools can control the direction of the light, shape specific lighting effects, and highlight the subject.
- Support Systems:
- Light stands, magic arms, and hanging systems can stably support lighting equipment, ensuring that the lighting remains stable during shooting.
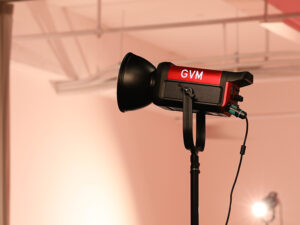
Lighting Setups for Different Shooting Scenarios
Now that you have the best lighting for studio photography and accessories, you need to understand and master lighting setup schemes. Lighting setup schemes vary depending on the usage scenario, as follows:
- Scenario 1: Portrait Photography – Emphasizing Soft Light to Create Atmosphere
- Scene: Indoor portrait photography, such as headshots, half-body shots, and full-body shots.
- Goal: Create soft, even light that highlights facial features and creates a comfortable atmosphere.
- Lighting Setup:
- Main Light: GVM PRO SD200B + Softbox/Parabolic Soft Umbrella (larger size, such as 90cm or larger). Use the SD200B as the main light source, diffusing the light through a softbox or soft umbrella to reduce light hardness and produce soft light and shadow transitions.
- Fill Light: Another GVM PRO SD200B (or a lower-power LED light, such as a GVM SD80D) + Reflector/Tracing Paper. Use as a fill light to fill in shadows, reduce the depth of facial shadows, and make skin tones look more even. A reflector can be used instead of a fill light to reduce costs.
- Hair Light/Rim Light (Optional): Small LED lights (or an SD80D). Placed behind the subject to illuminate the hair or shoulder outline, separating the subject from the background and increasing the sense of three-dimensionality.
- Adjustment Tips:
- The main light should be brighter than the fill light, forming a primary-secondary relationship.
- Adjust the position and brightness of the fill light to control the depth of the shadows.
- Use color temperature gels or filters to adjust the color of the light, creating different moods.
- The hair light should not be too bright to avoid overwhelming the main light.
- Scenario 2: Product Photography – Highlighting Details and Showcasing Texture
- Scene: Still life product photography, such as jewelry, cosmetics, and food.
- Goal: Clearly showcase product details, textures, and colors, highlight product textures, and avoid shadow interference.
- Lighting Setup:
- Main Light: GVM PRO SD200B + Softbox/Tracing Paper. Shine on the product from the front side to soften the light and highlight the product’s main features.
- Fill Light: GVM PRO SD200B (or small LED lights) + Reflector/Small Softbox. Used to fill in shadows, illuminate the dark parts of the product, and show more details.
- Top Light (Optional): Small LED lights. Shine on the product from above to outline the product’s shape and increase the sense of three-dimensionality.
- Background Light (Optional): Small LED lights (with color filters). Illuminate the background to separate it from the product or create a specific atmosphere.
- Adjustment Tips:
- Use light control tools (such as honeycombs and flags) to accurately control the range of light irradiation.
- Adjust the angle and distance of the light to avoid excessive reflections or shadows.
- Use a gray card to calibrate white balance to ensure accurate product colors.
- Scenario 3: Video Shooting – Stable and Continuous Illumination to Avoid Flickering
- Scene: Indoor video shooting, such as interviews, live broadcasts, and tutorials.
- Goal: Provide stable and continuous illumination, avoid flickering on the screen, and ensure natural skin tones and clear backgrounds.
- Lighting Setup:
- Main Light: GVM PRO SD200B + Softbox. Place in front of the camera to provide the main lighting.
- Fill Light: GVM PRO SD200B (or LED panel light). Fill in shadows to make the facial light more even.
- Background Light (Optional): LED panel light/small spotlight. Illuminate the background to add layering to the picture.
- Adjustment Tips:
- Make sure that all lights have the same color temperature to avoid color casts on the screen.
- Use a color temperature meter for accurate calibration.
- Pay attention to the heat dissipation of the lights to avoid brightness degradation due to overheating.
- Test before shooting to check for flicker or shadows on the screen.
General Recommendations:
- Adjust Flexibly: Lighting setup schemes are not fixed and need to be adjusted based on specific scenarios, shooting objects, and personal preferences.
- Practice More: Practice is the best teacher. Master the characteristics of various lighting effects through continuous experimentation.
- Make Good Use of Accessories: Softboxes, reflectors, and color temperature gels can help you better control the light.
Common Questions and Answers
- Which is better, continuous studio lighting or strobes?GVM LED lights are suitable for video shooting or continuous shooting scenarios, and their stable light can provide good illumination for videos; strobes are more suitable for high-power still photography and can freeze instantaneous movements. You can choose based on your main shooting needs.
- How to avoid overexposure or color casts?Use a light meter to accurately measure light intensity and calibrate white balance to ensure accurate exposure and true colors. During shooting, you also need to flexibly adjust the intensity, angle, and color temperature of the lights based on the actual situation.
- How to build a basic lighting system with a limited budget?It is recommended to first build a basic lighting system of 1 main light + 1 fill light + diffusion equipment, and then gradually improve the lighting equipment according to your needs.
Future Trends in Photography Lighting
- Intelligentization:Nowadays, intelligent lighting control methods such as APP control and voice adjustment are gradually emerging, and GVM is also actively exploring this field. With APP control, photographers can remotely adjust lighting parameters for convenient operation; voice adjustment further frees up hands, allowing photographers to focus more on creation.
- Virtual Production:LED backdrops are becoming increasingly popular in virtual production, and GVM is also paying close attention to this trend. LED backdrops can change the background image in real time, providing a wealth of scene choices for shooting, reducing shooting costs, and improving shooting efficiency.
- Environmental Protection and Energy Saving:With the increasing awareness of environmental protection, low-power, long-life LED lighting products will become the mainstream in the market, and GVM has always been committed to developing environmentally friendly and energy-saving lighting products to keep pace with the times.
best studio lights for photography: final words
When choosing photography lighting, there is no one-size-fits-all “best” product, only the lighting that best suits your shooting needs. However, if you want to keep your budget under $250, then the GVM PRO SD200B is undoubtedly what I call the best lighting for photography in 2025. It is recommended that you start with entry-level products, accumulate experience in practice, gradually upgrade your equipment, find the most suitable lighting, and embark on a creative journey of light and shadow.

