Cinematic lighting is one of the most effective ways to make your videos look more professional and visually engaging. However, achieving a cinematic look doesn’t require expensive equipment or a complex lighting setup. By carefully controlling light direction, color temperature, contrast, and light shaping, even beginners can create videos with greater depth and atmosphere.
Many new video creators spend hours on color grading, but overlook one important factor: color grading cannot fully fix poor lighting. A cinematic image starts with the right lighting setup before you even open your editing software.
This practical beginner’s guide introduces the core principles and simple lighting techniques you can use to create more cinematic-looking videos.
Table of Contents
What Is Cinematic Lighting?
Cinematic lighting is a lighting technique used to create a more professional, atmospheric, and visually engaging look in videos.Instead of simply making the subject bright enough to see, it uses light direction, shadows, contrast, color, and depth to shape the mood and visual style of a scene.
Good cinematic lighting can draw attention to the subject, add depth, and make a simple shot feel more polished. It is commonly used in films, YouTube videos, interviews, product videos, and short-form content.
In simple terms, cinematic lighting is about using light intentionally—not simply adding more light.

What Makes Lighting Look Cinematic?
A cinematic look isn’t created by simply making a scene brighter. Instead, it comes from how light is positioned, shaped, and balanced. By controlling a few key elements, you can create more depth, atmosphere, and visual interest in your videos.
1. Light Direction
The direction of light affects how your subject looks and how much depth the scene has. Side lighting can create stronger shadows and add dimension, while front lighting provides a more even but flatter look.
For a more cinematic effect, try positioning your key light slightly to the side of the subject rather than directly in front.
2. Shadows and Contrast
Shadows are an important part of cinematic lighting. Rather than eliminating every shadow, controlled shadows can add depth and make the image more dramatic.
The goal is to create a balance between light and shadow that suits the mood of your scene.
3. Color Temperature
Color temperature can strongly influence the mood of a video. Warm light can create a cozy or intimate feeling, while cool light can make a scene feel cleaner, more distant, or dramatic.
You can also combine warm and cool light to create color contrast and make the image more visually interesting.
4. Subject Separation
A cinematic image often has clear separation between the subject and the background. A rim light or backlight can highlight the edges of your subject, while controlling the background brightness helps create greater depth.
This makes the subject stand out and prevents the image from looking flat.

5 Cinematic Lighting Techniques for Beginners
Creating a cinematic look does not require a complicated lighting setup. Start with these fundamental lighting techniques, then adjust them based on your subject, shooting location, and creative style.
1. Start With Three-Point Lighting
Three-point lighting is a classic foundation for video lighting. It combines a key light, fill light, and backlight to create depth and better separate the subject from the background.
Position the key light at an angle to illuminate your subject. Use the fill light to soften harsh shadows without eliminating them completely, then add a backlight to help separate the subject from the background.
Beginner Tip: Start with the key light and add the fill light and backlight only when needed. This keeps your setup simple and easier to control.
2. Use Side Lighting for Greater Depth
Instead of placing your light source directly in front of your subject, try moving it slightly to the side. This creates more defined shadows, highlights facial features, and adds depth to your footage.
Side lighting works especially well for interviews, talking-head videos, and dramatic scenes.
3. Add a Rim Light or Backlight for Separation
A backlight or rim light can illuminate the edges of your subject, helping separate them from the background. This is particularly useful when the subject and background have similar brightness or colors.
You don’t need a high-output light for this technique. A small, well-positioned light can create a subtle edge highlight without making the lighting look unnatural.
4. Create Contrast With Warm and Cool Light
Using different color temperatures is an effective way to add visual interest to a scene. For example, you can use a warmer light on your subject while keeping the background cooler.
This warm-and-cool contrast can make a simple lighting setup feel more dynamic and cinematic.
5. Take Control of Your Background Lighting
Don’t focus only on lighting your main subject. The background also plays an important role in creating a cinematic image.
Reduce unwanted ambient light, add practical light sources, or use different color tones to shape the background. Keeping the background slightly darker than the subject can also help draw the viewer’s attention to your main subject.
How to Choose the Right Light for Cinematic Lighting
Choosing the right video light is about more than just raw output power. A good light should provide sufficient brightness while offering reliable color control, accurate color reproduction, and versatile light-shaping options to help you achieve the desired cinematic look.
For beginners, focus on these five key factors when choosing a video light:
1. Brightness and Output
Choose a light with enough output for your typical shooting environment. Higher-output lights offer greater flexibility, especially when shooting in larger spaces, using a softbox, or positioning the light farther away from your subject.
For compact setups such as talking-head videos or home studios, extremely high wattage isn’t always necessary. The goal is to have enough usable output with some headroom for adjustment.
2. Color Temperature
Color temperature determines whether your light appears warm or cool. A light with adjustable color temperature gives you greater flexibility when working with different environments and other light sources.
For example, you can use warmer settings for cozy indoor scenes or cooler settings to create a more dramatic mood. Bi-color lights are particularly beginner-friendly because you can adjust the color temperature without changing the light source.
3. Color Accuracy
Accurate color reproduction is important for cinematic video, especially when shooting people, skin tones, or products.
Look for lights with high CRI (Color Rendering Index) and TLCI (Television Lighting Consistency Index) ratings. Good color accuracy helps your camera capture more natural-looking colors and can also make the editing and color-grading process easier.
4. Light Control & Modifiers
Raw power alone doesn’t create cinematic results. Being able to shape, soften, and control light gives you much more creative flexibility.
Look for features such as smooth dimming and compatibility with softboxes, reflectors, grids, and other light modifiers. These accessories can help soften harsh shadows, control unwanted light spill, and direct light where you need it.
Beginner Tip: A powerful light without proper light control can create unwanted spill and make it harder to maintain the contrast and shadows you want.
5. Flexibility for Different Shooting Scenarios
Consider where and how you usually shoot. Home studios, interviews, product videos, and outdoor filming can all require different lighting solutions.
If you frequently shoot on location away from wall power, features such as battery power, portability, and wireless control can make your workflow much more flexible.
Recommended Lighting Equipment for Cinematic Videos
Once you understand the fundamentals of cinematic lighting, the next step is choosing a light that gives you enough output and control to put those techniques into practice.
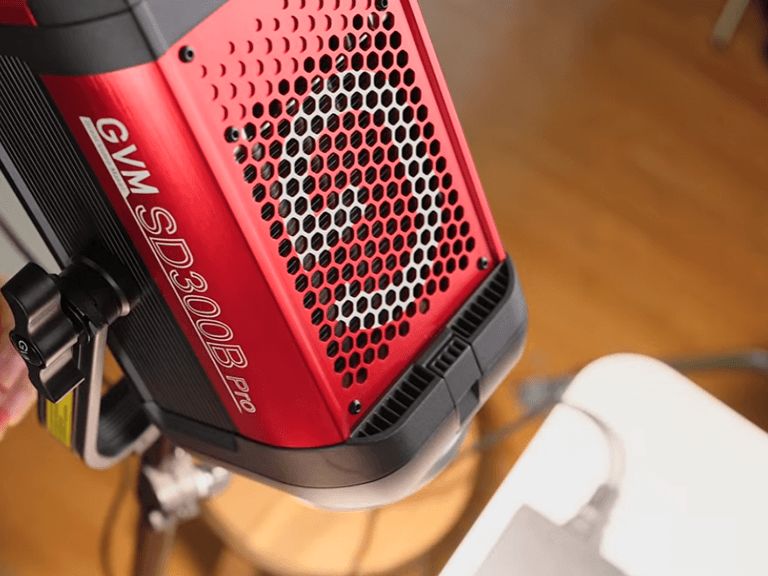
The GVM PRO SD300B is a versatile option for creators who want to build a flexible cinematic lighting setup. Its 300W bi-color COB output provides enough power for indoor video production, interviews, talking-head videos, and other creator-focused setups.
With a 2700K–6800K color temperature range, the PRO SD300B makes it easy to match different ambient lighting conditions or create warm-and-cool contrast within a scene. Its CRI and TLCI ratings of 97+ also help deliver accurate and natural-looking colors when shooting people and products.
The Bowens mount allows you to use compatible modifiers such as softboxes, giving you greater control over light quality, direction, and shadow softness. For creators who want to experiment with different cinematic looks, the light also offers built-in lighting presets, app-based control, and DMX control, providing more options as your lighting setup becomes more advanced.
For beginners, the main advantage is versatility: you can start with a simple key-light setup and gradually add modifiers or additional lights as your production needs grow.
Conclusion
Creating cinematic lighting doesn’t have to be complicated or require expensive gear. It starts with intentional lighting control, including light direction, balanced shadows, color temperature, contrast, and background lighting, to create depth and atmosphere.
Start with simple setups such as three-point lighting or side lighting, and focus on shaping and controlling your light rather than simply making your subject brighter. As you gain experience, you can add more lights and modifiers to create different cinematic looks.
Ultimately, good cinematic lighting starts on set, not in post-production. With practice and a better understanding of how light works, even beginners can create polished, professional-looking videos with greater depth and atmosphere.