What’s the real secret to stunning photography? It’s not pricey equipment, and it’s definitely not spending hours editing… it’s all about the light! As a commercial photographer obsessed with chasing that perfect light, I know firsthand how crucial it is for bringing out a product’s true allure.
That’s why I’m thrilled to share this ultimate guide to photo studio lighting kits!
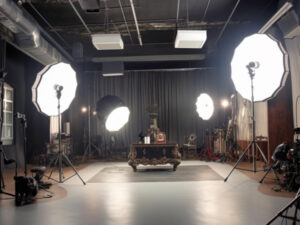
Whether you’re a beginner just starting out or a seasoned pro looking to sharpen your skills, this guide is for you.
We’re going to walk you through the world of photo studio lighting kits, diving deep into everything from understanding the fundamentals of light to choosing the right kit for your needs and mastering essential lighting techniques like three-point lighting – giving you the power to completely transform your product photos, attract more customers, and master the art of lighting.
For the looks you see in the following examples, the GVM-PRO-SD200B was my go-to key light. Want to know why? Click here.
Why Do You Need a Photo Studio Lighting Kit?
As a professional, I can tell you firsthand that whether you’re shooting portraits, products, or still life, good lighting instantly takes your work to the next level. While natural light is beautiful, it’s also unreliable and difficult to control. A photo studio lighting kit gives you the ability to: 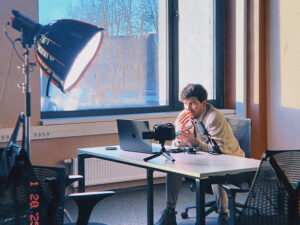
- Take Complete Control of Your Light: Adjust intensity, direction, and color to create the exact look you want.
- Shoot Anytime, Anywhere: No more relying on sunny days. Cloudy skies, rain, nighttime – you can shoot whenever and wherever you want.
- Improve Image Quality Dramatically: Professional lighting makes your photos sharper, more three-dimensional, and more engaging.
- Save Time in Post-Processing: Good lighting from the start means less editing later.
If you’re selling online or simply want to enhance the quality of your product photos, mastering studio lighting is essential. A clear, professional photo instantly makes your products more appealing and increases sales. Think about it: which would you click on – a product photo that’s dark and blurry, or one that’s bright, sharp, and shows off the product’s best features?
What’s in a Photo Studio Lighting Kit?
Don’t let the word “kit” intimidate you. It’s not as complicated as you might think. A basic photo studio lighting kit typically includes these key components:

- Lights: This is the heart of the kit, and they mainly fall into two categories:
- Continuous Lights: These stay on constantly, allowing you to see the effect in real-time. Common types include LED panels and fluorescent lights.
- Strobes/Flashes: These emit a burst of bright light. They’re more powerful and ideal for shooting with wide apertures or fast shutter speeds. They come in the form of speedlights (on-camera flashes) and studio strobes.
- Light Modifiers: These are used to soften and control light, reducing harsh shadows and creating a more flattering, even light. Common ones include:
- Softboxes: Enclose the light source, creating soft, diffused light that’s great for portraits and product shots.
- Umbrellas: Affordable and portable, umbrellas provide a relatively soft light.
- Reflectors: Use the principle of reflection to bounce light into shadow areas, brightening the image.
- Light Stands: Used to support your lights and modifiers, ensuring stability.
- Triggers: If you’re using strobes, triggers allow you to wirelessly control the flashes.
- Backdrops: Provide a clean, professional background, preventing distractions in your photos.
To capture high-quality product photos, you’ll also need these additional items:
- Tripod: Stability is crucial for product photography. A tripod eliminates camera shake, especially in low-light conditions.
- Background: Choose a simple, uniform background to highlight the product. White, black, or gray seamless paper or fabric are great options.
- Camera: A camera that allows for manual settings is a must. Manual mode gives you full control over aperture, shutter speed, and ISO for optimal exposure.
Choosing Your First Photo Studio Lighting Kit (For Beginners)
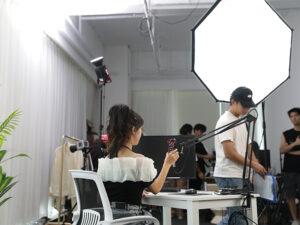 My advice? Start simple! When you’re just starting out with studio lighting, a basic photo studio lighting kit that includes the following is sufficient:
- Two LED Panel Lights (with Light Stands): LEDs are stable, produce little heat, and have a long lifespan, making them perfect for beginners. Two lights offer flexibility in creating different lighting setups.
- A 5-in-1 Reflector: Includes white, silver, gold, black, and diffusion surfaces, offering a wide range of uses for filling shadows and controlling light.
- A Softbox or Umbrella: Used to soften the main light, creating a more natural look.
- (Optional) A Simple Backdrop: A plain-colored backdrop will make your subject stand out.
Why LEDs are a Great Starting Point:
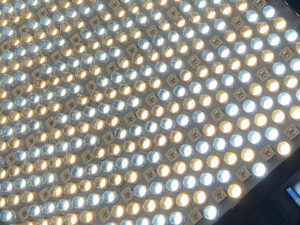 LEDs have many advantages, making them ideal for beginners:
- Easy to Use: The light is always on, allowing you to see the effect in real-time and adjust the lighting accordingly.
- Low Heat: They don’t generate a lot of heat like traditional bulbs, making shooting more comfortable.
- Long Lifespan: LEDs are very durable, saving you money on bulb replacements.
- Affordable: Compared to strobes, LEDs are more budget-friendly.
How to Use Your First Photo Studio Lighting Kit:
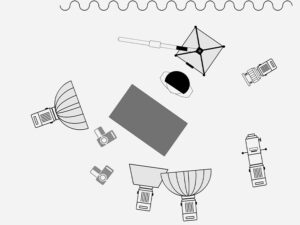 Now that you have your kit, it’s time to learn how to use it. Here are a few simple lighting techniques to get you started:
- One-Light Setup: The simplest setup. Use one LED light as your main light and a reflector to fill in the shadows.
- Two-Light Setup: Use two LED lights as your main light and fill light, adjusting their position and brightness to create different lighting ratios.
- Three-Point Lighting: In addition to the two lights, add a rim light (also called a hair light) to illuminate the edges of your subject, separating it from the background.
When choosing a background, consider the color and style of your products. In general, white, black, or gray backgrounds are the most versatile.
- White Background: Ideal for shooting light-colored products, creating a clean and bright look. Be careful to avoid overexposure; use a reflector to bounce light back into the shadows.
- Black Background: Great for dark or metallic products, creating a mysterious and high-end feel.
- Colored Background: Choose a color that complements your product, but be careful not to overpower it.
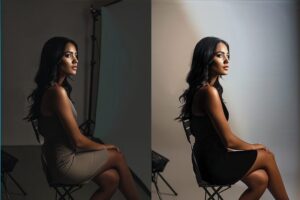
Lighting Considerations:
- Direction of Light: The direction the light comes from significantly affects the mood of the photo. Experiment with different angles to find what works best.
- Intensity of Light: Too much or too little light can affect the quality of your photos. Adjust the light’s brightness or change the distance between the light and the subject.
- Quality of Light: Hard light (direct light) creates strong shadows, good for emphasizing texture. Soft light (diffused light) reduces shadows, creating a smoother look.
- White Balance: Make sure your camera has the correct white balance setting, otherwise the colors in your photos might be off.
In product photography, the angle of light is critical.
- Side Lighting: Shining light from the side highlights the texture and details of the product.
- Top Lighting: Lighting from above creates a clean, bright effect.
- Bottom Lighting: Lighting from below creates a mysterious, dramatic effect (less commonly used, unless for a specific purpose).
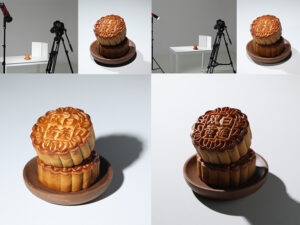 Choose the appropriate lighting angle based on your product and your shooting intentions.
Common Lighting Patterns
- Rembrandt Lighting: Characterized by a triangle of light on the subject’s cheek, very dramatic.
- Butterfly Lighting: The main light is positioned directly in front of and above the subject, casting a butterfly-shaped shadow below the nose, emphasizing facial contours.
- Loop Lighting: The main light shines from slightly above and to the side of the subject, creating a small loop of shadow on the side of the nose, very natural.
Three-point lighting is not only suitable for portrait photography but also for product photography.
- Key Light: Illuminates the main part of the product, determining the overall brightness of the photo.
- Fill Light: Fills in the shadows, making the product look more three-dimensional.
- Rim Light: Outlines the edges of the product, separating it from the background and making it more three-dimensional.
Experiment with different light positions and angles to find the lighting that best suits your product.
Tips for Buying a Photo Studio Lighting Kit:

- Budget: Choose a kit that fits your budget. You don’t need to buy the most expensive one to start.
- Brand: Choose a reputable brand with good quality and customer support.
- Needs: Consider your shooting needs and choose a kit that suits them.
- Read Reviews: Before buying, check out reviews from other users to learn about the product’s pros and cons.
Remember, Practice Makes Perfect!
With a photo studio lighting kit, the most important thing is to practice, practice, practice! Experiment with different lighting setups and find what works best for you.
Don’t be afraid to make mistakes – every mistake is a learning opportunity. Good lighting reduces the amount of post-processing needed, but some post-processing is still helpful.
You can adjust color, contrast, sharpness, etc., to make your photos perfect. Also, try shooting from different angles to showcase the products’ key details, allowing customers to fully understand your products. 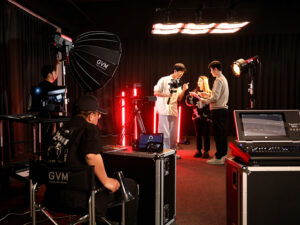
Whether it’s portrait or product photography, a photo studio lighting kit is a powerful tool for improving the quality of your work.
By mastering basic lighting techniques and continuing to experiment, you can create stunning photos and illuminate your photographic journey! So get started now!

