Are you ready to take your photography or filmmaking to the next level? Mastering studio lighting equipment is essential for achieving professional-looking results. But let’s be honest, wading through all the options and technical jargon can feel incredibly overwhelming, especially when you’re just starting out.
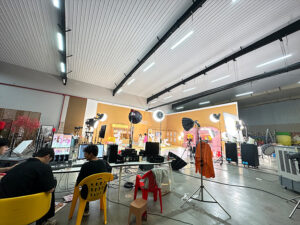
That’s why we’ve created this comprehensive guide – your one-stop resource for understanding and using studio lighting equipment. Whether you’re a complete beginner picking up a camera for the first time, or an intermediate photographer looking to refine your skills, this article will provide you with the knowledge and confidence you need to create stunning images and videos. Ready to dive deeper into spotlights? Check out our Spotlight Explained to further enhance your creative capabilities.
We’ll break down the essential equipment, explain key lighting concepts, and offer practical tips and techniques to help you get the most out of your studio setup. So, let’s dive in!
Understanding the Fundamentals of Studio Lighting
Before we start listing gear, it’s important to understand the basic principles. Studio lighting isn’t just about shining a bright light on your subject; it’s about shaping light, controlling shadows, and creating a desired mood.
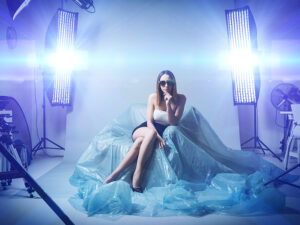
- The Classic Three-Point Lighting Setup: This is the foundation of many studio lighting setups. It consists of three key lights:
-
- Key Light: Your main light source, providing the primary illumination for your subject. (Image: Example of a key light illuminating a subject)
- Fill Light: Used to fill in the shadows created by the key light, reducing contrast and adding detail. (Image: Example of a fill light softening shadows)
- Backlight (Rim Light/Hair Light): Placed behind the subject to separate them from the background and create a halo effect. (Image: Example of a backlight creating separation)
- Light Temperature (Kelvin): Measured in Kelvin (K), light temperature affects the color cast of your images. Lower Kelvin values (around 2700K) produce warm, yellowish light, while higher values (around 5500K) produce cool, bluish light. Consistency in light temperature is crucial for accurate color rendition.
- Light Intensity and Power (Watts/Lumens): Watts measure the power consumption of a light, while lumens measure the total amount of visible light emitted. Higher lumens generally mean a brighter light. For beginners, understanding relative brightness is more important than focusing on exact wattage numbers.
- Hard Light vs. Soft Light: Hard light comes from a small, concentrated source and creates harsh shadows. Soft light comes from a larger, diffused source and produces softer, more gradual shadows. The type of light you use will significantly impact the mood and overall look of your images. (Image: Side-by-side comparison of hard and soft light)
Essential Studio Lighting Equipment: Building Your Toolkit
Now let’s explore the core equipment you’ll need to create a versatile studio lighting setup.
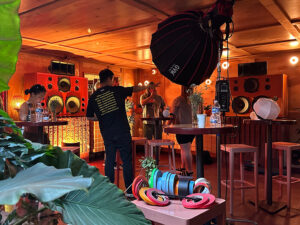
- Continuous Lighting: These lights provide a constant stream of light, making them ideal for beginners because you can see the effect of the light in real-time.
- LED Panels: Energy-efficient, versatile, and relatively affordable. They offer adjustable brightness and color temperature. (Image: Example of an LED panel)
- Fluorescent Lights: Less common now, but still a budget-friendly option. They produce soft, even light, but color accuracy can be a concern.
- When to use: Great for video, portraits, and product photography where you need to see the light effect immediately.
- Buying Considerations: Look for adjustable brightness, color temperature control (if possible), and a high CRI (Color Rendering Index) for accurate color rendition.
- Strobe Lighting (Monolights/Speedlights): These lights produce a brief, powerful burst of light, ideal for freezing motion and overpowering ambient light.
- Monolights: Self-contained strobe units with adjustable power output. They offer more power and control than speedlights. (Image: Example of a monolight)
- Speedlights: Portable, battery-powered flash units that attach to your camera’s hot shoe. They’re less powerful than monolights but offer greater versatility. (Image: Example of a speedlight)
- When to use: Ideal for portraits, fashion photography, and situations where you need a lot of power.
- Buying Considerations: Power output (measured in watt-seconds), recycle time (how quickly the light recharges), TTL (Through-The-Lens) vs. manual control.
- Light Modifiers: Shaping Your Light
- When to Use: Versatile for portraits, product photography, and any situation where you need soft, flattering light.
- Buying Considerations: Size, shape, and diffusion material will affect the softness and direction of the light.
- Light modifiers are essential for controlling the quality and direction of your light.
- Softboxes: Enclose the light source and diffuse the light, creating soft, even illumination. They come in various shapes and sizes (square, rectangular, octagonal). (Image: Examples of different softbox shapes)
- Umbrellas: Reflect or transmit light, creating a broad, soft light source. They’re more affordable and portable than softboxes. (Image: Examples of reflective and shoot-through umbrellas)
- When to Use: Good for general fill light and creating a natural-looking light.
- Buying Considerations: Reflective umbrellas bounce the light, while shoot-through umbrellas diffuse it.
- Reflectors: Bounce light onto your subject, filling in shadows and adding highlights. They come in different colors (white, silver, gold) to adjust the color temperature of the reflected light. (Image: Examples of different reflectors)
- When to Use: Inexpensive and versatile for filling shadows and adding detail.
- Buying Considerations: Size, shape, and color will affect the intensity and color of the reflected light.
- Light Stands: Essential for supporting your lights and modifiers. Look for sturdy stands that can support the weight of your equipment. (Image: Example of a light stand)
- Backgrounds: Set the scene and create a professional backdrop for your photos and videos. Options include paper, fabric, and vinyl backgrounds. Choose a color that complements your subject and overall aesthetic. (Image: Examples of different studio backgrounds)
Setting Up Your First Studio Lighting Setup: A Step-by-Step Guide
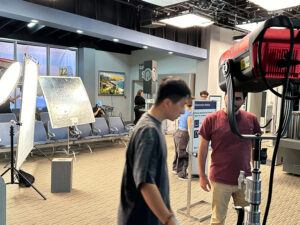
- Choose Your Location: Select a space that’s large enough to accommodate your equipment and your subject. Consider the availability of power outlets and the color of the walls (neutral colors are best).
- Position Your Key Light: Place your key light at a 45-degree angle to your subject, slightly above eye level.
- Add Your Fill Light: Position your fill light on the opposite side of your subject, slightly lower and less powerful than the key light. This will fill in the shadows and reduce contrast.
- Consider a Backlight (Optional): Place your backlight behind your subject, aiming it towards their shoulders or hair. This will create separation and add depth to your images.
- Experiment with Light Modifiers: Use softboxes, umbrellas, or reflectors to shape and soften the light.
- Use a Light Meter (Optional, but Recommended for Strobe Users): A light meter will help you accurately measure the light intensity and ensure consistent exposures.
Essential Studio Lighting Techniques to Master:
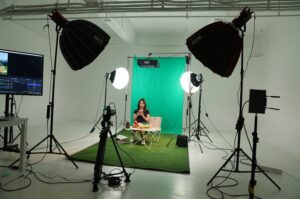
Butterfly Lighting: A classic portrait lighting technique that creates a butterfly-shaped shadow under the nose. (Image: Diagram of butterfly lighting setup)
Loop Lighting: Similar to butterfly lighting but with the key light positioned slightly to the side, creating a loop-shaped shadow. (Image: Diagram of loop lighting setup)
Rembrandt Lighting: Creates a small triangle of light on the cheek opposite the key light, producing a dramatic and moody effect. (Image: Diagram of Rembrandt lighting setup)
Basic Product Photography Lighting: Typically involves using two lights placed on either side of the product, with a reflector to fill in shadows.
Common Studio Lighting Mistakes and How to Avoid Them
Using Too Much or Too Little Light: Experiment with different power settings and distances to find the right balance.
Ignoring Color Temperature: Ensure that all your light sources have a similar color temperature to avoid color casts.
Not Modifying the Light: Light modifiers are essential for shaping and softening the light.
Poor Background Choice: Choose a background that complements your subject and doesn’t distract from the overall image.
Forgetting to Meter (Strobe Users): Using a light meter for each set up is important for consistent and proper exposure.
Level Up Your Studio Lighting: Advanced Tips
Use Gels: Add color to your lights using gels to create unique and dramatic effects.
Create Dramatic Shadows: Experiment with hard light and unusual light angles to create strong shadows.
Combine Natural and Artificial Light: Blend natural light with studio lighting to create a more natural-looking and balanced image.
Studio lighting equipment: final words
Mastering studio lighting equipment takes time and practice, but it’s an essential skill for any photographer or filmmaker who wants to create professional-quality work. By understanding the fundamental concepts, investing in the right equipment, and experimenting with different techniques, you can unlock your creative potential and capture stunning images and videos.

