
The best lighting for food photography is usually just two continuous lights: a diffused 200W–300W CRI 97+ key placed 90°–135° to the side-back to catch steam and glaze, plus a 15°–45° focusing spot or white bounce card opposite the key at a 2:1 to 4:1 ratio. That's the whole recipe.
Key Takeaways
- Hot Entrees & Steam: Backlight from 135° at 25° elevation against a dark backdrop.
- Bakery & Flat-Lays: Feather a 24" parabolic softbox at 90°, or boom it overhead at 20°.
- Color & Restaurant Lock: Insist on CRI 97+ / TLCI 97 (
5600Kstudio or3200Kdining room).
Quick Setup Map: Match Your Dish & Space to the Best Lighting for Food Photography
Before clamping on a modifier, look at the dish: is it glossy, crumbly, see-through, or steaming? Front light beside the lens fills every crumb shadow and leaves food looking flat, like a fast-food menu board. Side and three-quarter back light skims across sauces, crusts, and herbs instead—giving food the shape that makes people hungry.
| Dish Category & Shooting Environment | Core Lighting Setup (5 Classic Angles) | Primary Key / Overhead Pick | Rim, Backlight or Bounce Pairing | Ideal Kelvin & Contrast Ratio |
|---|---|---|---|---|
| 1. Hot Soups, Ramen & Seared Steaks | Setup #1: 135° Three-Quarter Backlight | GVM SD300B AIO Softbox Kit | GVM PF100B 100W Focusing Light at 15° Spot for Steam | 5200K–5600K | 3:1 to 4:1 Crisp Specular Glaze |
| 2. Tall Burgers, Pastries & Matte Grains | Setup #2: 90° Feathered Side Window Light | GVM SD300B AIO w/ 24" Gridded Parabolic | White Foam Board (2:1) or Black Card (4:1) Opposite Key | 5000K–5600K | 2:1 Bright Cafe or 4:1 Rustic |
| 3. Overhead Pizza, Charcuterie & Prep Reels | Setup #3: 15°–25° Angled Top-Down Flat-Lay | GVM SD300B AIO or Compact GVM SD80D Kit on Boom | 6-O'Clock Table-Edge White Bounce Card | 5600K Daylight | 2:1 Even Tabletop Wrap |
| 4. Cocktails, Wine & Translucent Citrus | Setup #4: 120° Dark-Field Rim + Under/Back Glow | GVM FA200C AIO 200W RGB COB | GVM PF100B Barn-Door Beam on Glass & Garnish | 5600K Key + HSI Amber/Cyan Accent | 4:1 Dramatic |
| 5. Dim Restaurant Booths & Chef's Table | Setup #5: 3200K Bi-Color Ambient Match | GVM PF100B (V-Mount) or GVM SD80D (NP-F) | Diffused 45° Side-Backlight Preserving Practicals | 2700K–3200K Tungsten Match | 3:1 Moody Dining |
Building a tabletop bench or packing a kit for restaurant jobs? Browse our high-CRI Bowens mount COB monolights on the official GVM Shop. If you also shoot packaged goods, the layouts in our product photography lighting setup guide carry over to food surprisingly well.
5 Best Lighting for Food Photography Setups: Step-by-Step Angles & Power Ratios
Getting the best lighting for food photography comes down to the angle at which light hits liquids, crumbs, and glazes. Continuous CRI 97+ LEDs make that easy to see: you watch highlights slide around in the viewfinder as you nudge the stand, and switch from stills to 60fps pour shots without touching the lights.
Setup 1 & Setup 2: 135° Three-Quarter Backlight (Steam & Glaze) vs. 90° Feathered Side Light (Crumb Texture)
For Setup 1 (135° Three-Quarter Backlight), put your main diffused COB or focusing spot behind the dish at 10 o'clock or 2 o'clock (125°–145° off camera axis), raised 20°–30° above the bowl rim. Because the light skims toward the lens, ramen broth, melted cheese, and steak glaze pick up sparkling micro-highlights, and rising steam turns bright white against a dark backdrop. Prop a white bounce card at 45° front-side (0.4–0.6 m away) to bring back 25%–50% fill so the front never drops into muddy shadow.
For Setup 2 (90° Feathered Side Window Light), swing the softbox to 80°–100° at 1.0–1.4 m (3.3–4.6 ft) and feather the beam—aiming just past the front edge of the plate rather than straight at it. The soft edge rakes sideways across stacked burgers, sourdough crust, and flaky pastry, digging out texture in every layer. Want a moodier 4:1 look? Swap the white card for a matte black flag.

Setup 3: Top-Down Flat-Lay vs. 45° Backlight for Grazing Tables
For 90° bird's-eye brunch spreads, pizza boards, or recipe prep (Setup 3), never mount a light right beside the lens—on-axis top light flattens everything and turns soup spoons into white mirrors. Boom a gridded softbox at a 15°–25° tilt off vertical (0.9–1.3 m / 3–4.3 ft high) from the top or side of the frame, and lay a white bounce card along the 6 o'clock table edge. Rigging a camera straight down over cooking prep or flat-lay plates? Use our C-stand overhead video lighting setup for tabletop shoots to keep stands out of frame.
Setup 4 & Setup 5: 120° Dark-Field Beverage Backlight & 3200K Restaurant Booth Matching
Setup 4 (120°–135° Dark-Field Rim & Translucent Glow) is your drinks setup. Place a gridded softbox 120°–135° behind a cocktail, wine glass, or sliced citrus, then aim a tight 15° beam (GVM PF100B with barn doors) through the liquid or fruit from behind so ice crystals and citrus membranes light up like stained glass.
Setup 5 (3200K Restaurant Ambient Match) is about restraint. Blasting 5600K daylight into a dim dining room wipes out the mood. Dial a bi-color fixture (GVM PF100B, FA200C AIO, or battery-powered SD80D) down to 2700K–3200K to match warm Edison bulbs, running at 20%–35% output from 100°–135° side-back.
| Lighting Role | Angle (Off Camera Axis) | Distance to Subject | Power Ratio (vs. Key) | Modifier & GVM Pick |
|---|---|---|---|---|
| 1. Side Window Key (Setup #2 & #3) | 80°–95° side (or 15°–25° tilted overhead for flat-lays) | 0.9–1.4 m (3–4.6 ft) | 100% (Reference) | GVM SD300B AIO + ZYG60SPR 24" Parabolic w/ Grid (Modifier Only — Light Fixture Not Included) |
| 2. 135° Steam & Glaze Backlight (Setup #1) | 125°–145° rear-side, elevated 20°–30° above plate | 0.8–1.2 m (2.6–4 ft) | 100%–130% (+0.5 Stop Rim) | GVM PF100B Focused at 15°–25° w/ 4-Leaf Barn Doors |
| 3. Front-Side Bounce / Negative Fill | 35°–45° front-side opposite the key light | 0.3–0.6 m (1–2 ft) | 40%–50% [2:1 Bright] / 0% Black [4:1 Moody] | White Matte Foam Board or Black Flag (or SD80D at 25%) |
| 4. Beverage Glow & Restaurant Accent (#4 & #5) | 120°–135° rear strip or low table-level grazing beam | 0.6–1.0 m (2–3.3 ft) | 25%–50% (3200K or HSI Hue) | GVM FA200C AIO (2000K–10000K RGBWW) |
Food Photography Lighting Setup: Camera Settings, 3200K–5600K White Balance & Natural Light vs. LED
Window light is free, continuous, and flicker-free, but its color drifts from 6500K under clouds to 3500K near sunset—so dish #1 and dish #12 on a menu shoot won't match, and windowless kitchens have none at all. Flash strobes (Ws) freeze splashes at 1/4000s, but you won't spot ceramic rim glare until after firing, and they can't shoot 60fps video. A continuous LED rig (W) solves both. Lock it down with three rules:
- Manual Kelvin & High R9 (CRI 97+ / TLCI 97): Cheap household bulbs lack deep red (
R9), turning rare steak and tomato glaze gray-brown. Turn off AWB and lock lights and camera to5400K–5600Kfor daylight sets or3000K–3200Kfor warm dining booths. Our indoor photography lighting guide covers room-balancing rules. - Macro Focal Lengths (
85mm–100mm) & Aperture: Shoot atf/2.8–f/4from a 45° hero angle for creamy bokeh, or stop down tof/8–f/11(ISO 100–200on a tripod) for 90° flat-lays so tall and flat items stay sharp. - Flicker-Free Shutter & CPL Filter: Set video shutter to
1/60s(29.97fps) or1/120s(59.94fpspours) and twist a Circular Polarizer (CPL) on your lens to calm glare on glazed plates and broth.

Food Photography Lighting Troubleshooting: Fast Fixes for Plate Glare & Dead Steam
Wet glaze, oil droplets, and porcelain rims behave like tiny curved mirrors (angle of incidence = angle of reflectance). When a highlight clips on your monitor, don't reach for the dimmer—turning down the key only underexposes the food. Move the modifier, swap the backdrop, or rotate your polarizer using this 60-second Gaffer cheat sheet:
| Visible Symptom | Fast Adjustment | Why It Works |
|---|---|---|
| Blown-out white hotspot on glossy ceramic plate rims or dark soy glaze | Raise the softbox stand 15–20 cm, feather the beam across the front of the plate rather than aiming the center at the dish, and rotate a CPL filter on your lens. | Changes the angle of reflectance so direct specular bounce misses the lens axis while polarized glare is filtered out. |
| Rising steam over hot soup or coffee is invisible on camera | Switch off front light, place a matte black card behind the bowl, and aim a focused 15°–25° beam (GVM PF100B w/ barn doors) from 135° rear-side through the steam plume. | Water vapor particles scatter light forward toward the lens (Mie scattering) and only register against a darker background. |
| Food looks flat, pasty, and lacks crispy crumb or crust texture | Move your key light from near the camera axis to a 90° side or 135° back-side raking angle and attach a fabric honeycomb grid. | Grazing light casts micro-shadows behind every crumb and sear ridge, restoring three-dimensional surface relief. |
| Beef looks gray-brown and salad greens look muddy yellow in restaurant shoots | Turn off overhead household commercial fluorescent/LED bulbs, switch camera AWB to manual 3200K or 5600K, and light solely with a CRI 97+ / TLCI 97 GVM fixture. | Eliminates green/magenta spectral spikes and low-R9 color starvation caused by non-photographic room bulbs. |
On most sets, pairing a double-diffused 24-inch parabolic softbox (GVM ZYG60SPR with 45° grid) and a lens CPL solves 90% of glare issues—letting you tame shiny plate rims without losing the oil highlights that make meat and noodles look appetizing.
Recommended GVM Starter & Pro Bundles for Food Photography Lighting
You don't need to surround a table with identical flat panels. Pair one diffused artificial-window key with one focusing backlight (or full-color accent COB) to cover every dish above. All specs come from official GVM sheets; unpublished values are marked Official N/A.
1. GVM SD300B AIO 300W LED Video Light 1-Light Softbox Kit: Best All-in-One Artificial Window Key Bundle
Think of the SD300B AIO as a north-facing window you can switch on at midnight. Set the 2.8 kg head 1.0–1.4 m (3.3–4.6 ft) out at 90° side or 135° rear-side, sweeping 2700K–6800K via rear knobs or the GVM Bluetooth Mesh app.
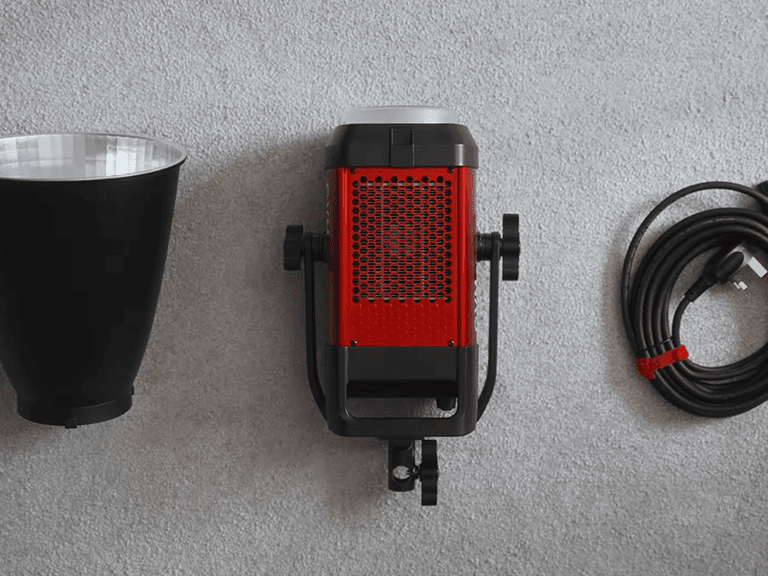
The Breakdown:
- Diffused Punch for
f/8–f/11Flat-Lays: Puts out11,440 Lux @ 1m(Bare) and221,950 Lux @ 1m(With Standard Reflector), holding baseISO 100through double diffusion. - CRI 97+ / TLCI 97 Appetite Color: Red meat and pastry crust keep their true color across
2700K–6800Kwith 12 source presets. - 2.8 kg Ballast-Free 1-Light Bundle: Integrates the AC
100–240Vsupply inside the head and ships with a Bowens softbox and stand.
| Spec | Detail |
|---|---|
| Power & Lux @ 1m | 300W | 11,440 Lux @ 1m (Bare) / 221,950 Lux @ 1m (With Standard Reflector) [At 3m: 1,350 Lux Bare / 12,580 Lux w/ Reflector] |
| CCT & CRI / TLCI | 2700K–6800K Bi-Color + 12 Source Presets & FX | CRI 97+ / TLCI 97 |
| Control | On-board LCD & Knobs, GVM Bluetooth Mesh App, DMX |
| Mount | Standard Metal Bowens S-Mount (Softbox & Light Stand Included) |
| Power & Weight | AC 100–240V Integrated (All-in-One) | Net Weight: 2.8 kg (6.2 lb) incl. Yoke |
Pros:
- Complete 1-light starter kit: 300W integrated head, Bowens softbox, and stand in one box.
- Runs quietly at 35%–50% output so recipe reel audio stays clean.
- Standard metal Bowens mount fits parabolic domes, strip boxes, and lanterns.
Cons:
- AC power only (for cordless dual NP-F battery shoots, look at the 80W
GVM SD80D Monolight Kit).
Getting spill on dark slate backdrops? Add the GVM ZYG60SPR 24" Quick-Setup Parabolic Softbox w/ Grid (Modifier Only — Light Fixture Not Included). For a hard steam backlight, pair it with the GVM PF100B Focusing Light.
👉 Shop GVM SD300B AIO Kit on GVM Shop →
2. GVM PF100B 100W Focusing Bi-Color LED Light: Best 15°–45° Optical Zoom Backlight for Steam & Beverage Sparkle
This is the light that makes steam show up on camera. Place the ~1.53 kg PF100B at 135° rear-side (0.8–1.2 m / 2.6–4 ft), zoom the barrel from 45° flood to a 15° spot with 4-leaf barn doors, and dial 0.1% steps via knob or Bluetooth Mesh app.

The Breakdown:
- Built-In
15°–45°Optical Zoom: Squeezes 100W from3,460 Lux @ 1m(45°Wide) to30,200 Lux @ 1m(15°Spot) for pinpoint glaze and drink refraction. 0.1%Dimming & CRI 97+ / TLCI 97: Fine-tune specular highlights across2700K–6800Kwithout blowing out white porcelain.- AC or V-Mount Restaurant Mobility: Run it from wall AC (
DC 20V) or a 14.8V V-mount battery in tight dining booths.
| Spec | Detail |
|---|---|
| Power & Lux @ 1m | 100W | Up to 30,200 Lux @ 1m (15° Spot) / 3,460 Lux @ 1m (45° Wide) |
| CCT & CRI / TLCI | 2700K–6800K Bi-Color + Scene FX | CRI 97+ / TLCI 97 (WP #97841) |
| Control | 0.1% Stepless Knob, On-board LCD, GVM Bluetooth Mesh App |
| Mount | Mini Bowens Mount (Includes 4-Leaf Barn Doors; Single Light Fixture) |
| Power & Weight | AC Adapter (DC 20V) + V-Mount Battery Support | Net Weight: Official PDP N/A (~1.53 kg per GVM Engineering Spec) |
Pros:
- Concentrated
30,200 Lux @ 1m(15°Spot) makes rising steam and translucent citrus glow. - Included 4-leaf metal barn doors cut narrow light streaks without spilling onto dark backgrounds.
- Small enough to fit cramped restaurant corners where full-size softboxes won't go.
Cons:
- Single fixture with no stand or softbox, using a dedicated Mini Bowens Mount (fits
GVM Mini Dome 40, not full-size S-type modifiers). Need full-size Bowens and RGBWW color for bar backdrops? See the GVM FA200C AIO.
👉 Shop GVM PF100B on GVM Shop →
3. GVM FA200C AIO 200W RGB COB Video Light: Best 104mm Flathead RGBWW Light for Beverage Commercials & Tight Kitchens
At 104mm thin, the FA200C AIO slips behind a cocktail bar where bulkier lights won't fit. Set it at 120°–135° (0.6–1.2 m / 2–4 ft) to push amber or ice-blue hues through liquor bottles, or dial 2000K–10000K white light via NFC and the GVM Bluetooth Mesh app.
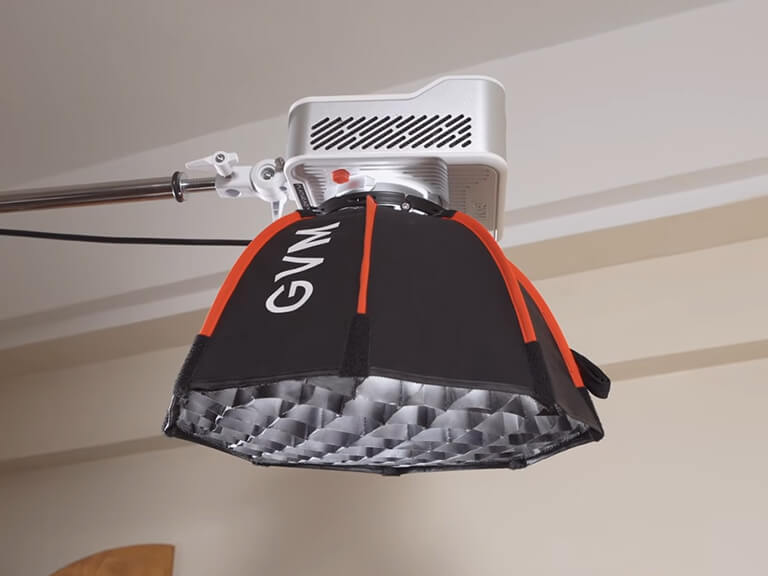
The Breakdown:
2000K–10000K+ RGBWW Color: Runs from2000Kfireside warmth to10000Kblue-hour cool plus HSI/GEL modes at CRI 97+ / TLCI 97+.- Verified 200W Output: Delivers
8,820 Lux @ 1m(Bare) and36,700 Lux @ 1m(With Standard Reflector;8,490 / 35,200 Lux @ 1mat5600Kin GVM Lab testing). - 104mm All-in-One Chassis: Built-in AC
100–240Vsupply and standard Bowens S-mount save40–50 cmon an overhead kitchen boom.
| Spec | Detail |
|---|---|
| Power & Lux @ 1m | 200W | 8,820 Lux @ 1m (Bare, Official PDP) / 36,700 Lux @ 1m (w/ Reflector, Official PDP) [GVM Lab 5600K: 8,490 Bare / 35,200 w/ Reflector] |
| CCT & CRI / TLCI | 2000K–10000K Bi-Color + RGBWW, HSI, GEL & Scene FX | CRI 97+ / TLCI 97+ |
| Control | On-board LCD & Knobs, GVM Bluetooth Mesh App, NFC Quick Connect |
| Mount | Standard Metal Bowens S-Mount (Single Fixture; Stand & Softbox Sold Separately) |
| Power & Weight | AC 100–240V Integrated (All-in-One) | Net Weight: Official N/A |
Pros:
2000Klow end matches candlelight and wood-fired ovens with no orange gels needed.- Ultra-shallow 104mm flathead booms easily in an 8-foot apartment kitchen.
- Standard Bowens S-mount fits
ZYG60SPRparabolic andYF4060Hstrip softboxes.
Cons:
- Ships as a bare lamp head with no stand or softbox (and note that strap-on panel softboxes use a Proprietary Mount — Only Compatible with 480LS / 560AS / 800DRGB Series, Not Standard Bowens Mount). Prefer a kit with stand and softbox included? Jump to the GVM SD300B AIO Softbox Kit.
👉 Shop GVM FA200C AIO on GVM Shop →
Best Lighting for Food Photography FAQs
Q1: Is continuous LED lighting or flash strobe better for food photography?
For most food photographers shooting both stills and video, continuous LED lighting is the better choice—you see plate glare, sauce highlights, and shadow falloff in real time, and the same light works for photos and 4K 60fps recipe videos. Flash strobes (Ws) only earn their place when freezing mid-air splashes at 1/4000s.
Q2: What color temperature (Kelvin) is best for food photography?
Set your lights and camera white balance to 5400K–5600K for clean daylight studio and cookbook work, or dial bi-color LEDs to 3000K–3200K to match warm tungsten bulbs in a restaurant. Either way, turn off auto white balance (AWB) and ceiling lights so white plates and red meat match across every frame.
Q3: How many watts do I need for tabletop food photography?
On a 1.0–1.5 m tabletop shooting through a double-diffused softbox at ISO 100–200 and f/5.6–f/8, plan on a 150W–300W Bowens COB monolight (8,500–17,000 Lux @ 1m Bare) as your key and a 60W–100W focusing light (GVM PF100B) as your backlight. Double diffusion eats ~50% of bare output, so 200W–300W keeps you out of noisy high-ISO territory.
Q4: Why should you never place your key light directly in front of the camera for food shots?
A light at 0° right beside the lens wipes out the tiny shadows that show texture and bounces a harsh white hotspot off glossy plates and sauces straight into the camera. Put your key at 90° side or 135° three-quarter backlight instead to bring back depth and appetite appeal.
Final Takeaway: Pre-Shoot Food Styling & Lighting Checklist
Run through this list before the food leaves the kitchen—hot dishes don't wait while you move stands around:
- Kill Room Bulbs & Lock Kelvin: Turn off kitchen ceiling LEDs and lock lights and camera to
5600K(daylight) or3200K(restaurant booth). - Eliminate Rim Glare First: Feather your
90°or135°softbox on a stand-in plate and rotate your lens CPL until white hotspots disappear. - Aim the
135°Steam Spot: Zoom yourGVM PF100Bto15°–25°across the rear rim against a black card before pouring hot broth. - Enable Silent Cooling: Switch GVM COB fans to
Silent / Smartmode so recipe video audio stays clean.