* Introduction
* Importance of lighting in food photography
* Understanding natural lighting
* Types of artificial lighting for food photography
* Tips for choosing the right light source
* Using diffusers and reflectors
* Setting up the lighting for different food subjects
* Common lighting mistakes to avoid
* Editing and post-processing techniques for enhancing light in food photos
* Conclusion
Introduction
Imagine a plate of freshly baked chocolate chip cookies, straight out of the oven. The aroma wafts through the air, tempting you to take a bite. You reach for your camera, eager to capture the beauty of these delectable treats. But wait! Before you press that shutter button, there’s something you need to know – lighting is the secret ingredient that can make or break your food photography.
Lighting plays a crucial role in food photography, as it has the power to transform a simple dish into a mouthwatering masterpiece. The right lighting can enhance textures, highlight colors, and create a captivating mood. In this article, we will explore the importance of lighting in food photography, delve into the different types of lighting, discuss tips for choosing the right light source, and uncover common mistakes to avoid. So grab your camera and let’s shed some light on this delicious subject!
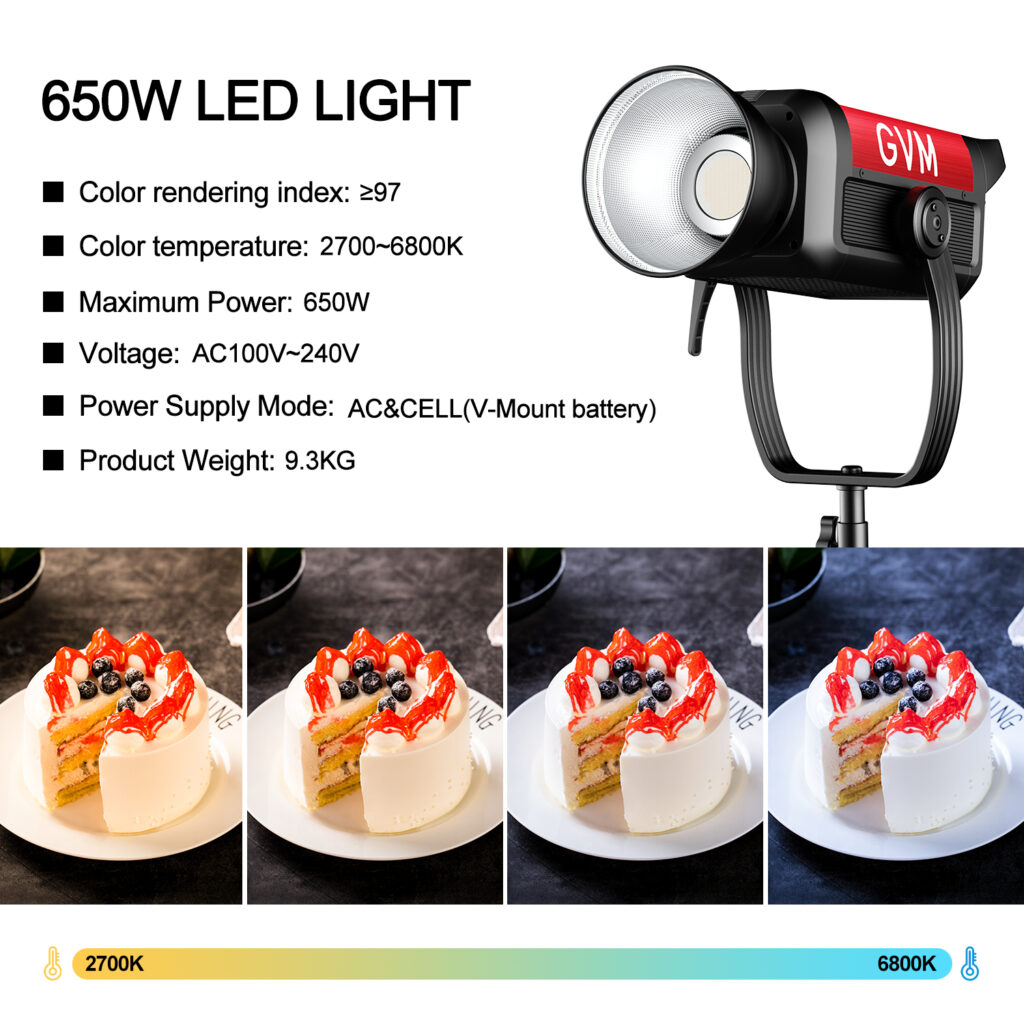
The new GVM SD650B Bi-Color Spotlight is a powerful light source with high color rendering index CRI 97+ & TLCI 97+ which can achieve accurate color
rendering on the camera and restore the most realistic object color.
Limit discounts: Save $220

Importance of Lighting in Food Photography
When it comes to food photography, lighting is everything. It sets the stage, creates atmosphere, and brings your dishes to life. The right lighting can make the difference between a mediocre shot and a stunning image that leaves viewers craving for more.
Lighting helps to accentuate the textures in food, making it appear more appetizing. It can bring out the vibrant colors of fruits and vegetables, making them look fresher and more enticing. By manipulating light, you can also create shadows and highlights that add depth and dimension to your photographs.
Furthermore, lighting can evoke certain emotions and set the mood for your images. Soft, diffused light can create a cozy and intimate feel, while bright and vibrant lighting can give a sense of freshness and energy. Understanding how to manipulate light allows you to tell a story through your photographs, captivating your audience and making them feel like they are right there, about to take a bite.

Understanding Natural Lighting
Natural lighting is a food photographer’s best friend. It is readily available, versatile, and can produce stunning results. The key to harnessing the power of natural light is understanding its characteristics and knowing how to work with it.
The most desirable natural light for food photography is soft and diffused. This can be achieved by shooting near a window on an overcast day or using sheer curtains or diffusers to soften harsh sunlight. Soft light eliminates harsh shadows and creates a gentle, flattering glow that enhances the details and colors of your food.
When shooting outdoors, consider the time of day. The golden hour, which occurs during sunrise or sunset, provides a warm, soft light that casts a magical glow on your food. Avoid shooting in direct, harsh sunlight, as it can create strong shadows and result in overexposed or washed-out images.
Types of Artificial Lighting for Food Photography
Natural light may not always be available or suitable for your food photography needs. In such cases, artificial lighting comes to the rescue. There are several types of artificial lighting options to consider:
**1. Continuous Lighting:** Continuous lighting sources, such as LED panels or tungsten lights, provide a constant source of light. They allow you to see the lighting effects in real-time, making it easier to adjust and fine-tune your setup. Continuous lighting is ideal for beginners as it is easy to work with and provides consistent results.
**2. Speedlights:** Speedlights, or external flashes, are portable and versatile lighting options. They can be used on or off-camera, allowing you to experiment with different angles and positions. Speedlights offer a powerful burst of light that can be adjusted to create the desired effect.
**3. Studio Strobes:** Studio strobes are powerful lighting units that provide a burst of light when triggered. They are commonly used in professional studios and allow for precise control over lighting intensity, duration, and color temperature. Studio strobes are ideal for advanced photographers who require more control over their lighting setup.
Tips for Choosing the Right Light Source
Choosing the right light source for your food photography is crucial to achieving the desired results. Here are some tips to help you make the right choice:
**1. Consider the Mood:** Think about the mood and atmosphere you want to convey in your photographs. Soft, diffused lighting creates a cozy and intimate feel, while bright, natural light can give a sense of freshness and vibrancy.
**2. Evaluate Color Temperature:** Different light sources have varying color temperatures, which can affect the overall look of your images. Warm light, such as candlelight or tungsten, creates a cozy and inviting atmosphere, while cool light, such as daylight or LED, gives a fresh and modern feel.
**3. Assess Light Intensity:** Consider the power and intensity of the light source. Some dishes may require more light to bring out the colors and textures, while others may benefit from a softer, more subtle illumination.
**4. Experiment and Practice:** Don’t be afraid to experiment with different light sources and techniques. Every dish is unique, and it may require some trial and error to find the perfect lighting setup. Practice regularly to refine your skills and develop a deeper understanding of how light interacts with food.
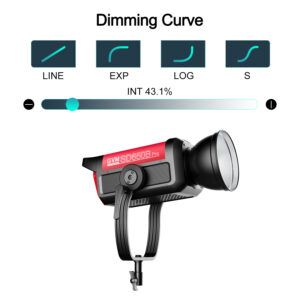
The new GVM SD650B Bi-Color Spotlight has 4 Dimming curves:Line,Exp,Log,S
You can choose different curves and adjust the slope of the light brightness change
Using Diffusers and Reflectors
Diffusers and reflectors are essential tools in a food photographer’s arsenal. They help manipulate light, control shadows, and enhance the overall quality of your images.
**Diffusers** soften and spread light, reducing harsh shadows and creating a more even illumination. They can be made from materials such as sheer fabrics or specialized diffuser panels. Place the diffuser between the light source and your subject to achieve a soft, diffused light that beautifully illuminates your food.
**Reflectors** bounce light back onto your subject, filling in shadows and adding a touch of brightness. They can be made from materials like foam boards, aluminum foil, or specialized reflector discs. Experiment with different reflector sizes and angles to achieve the desired effect.
By using diffusers and reflectors in combination with natural or artificial light sources, you can achieve a more controlled and professional look in your food photography.
Setting Up the Lighting for Different Food Subjects
Every dish has its unique characteristics and requires a specific lighting setup to capture its essence. Here are some general guidelines for setting up lighting for different food subjects:
**1. Fresh Ingredients:** When photographing fresh produce, such as fruits and vegetables, natural light is often the best choice. Soft, diffused lighting brings out the vibrant colors and textures, making the ingredients appear fresh and inviting.
**2. Baked Goods:** To capture the warm and inviting nature of baked goods, such as bread or pastries, using warm artificial lighting. The soft shadows and gentle highlights created by warm light can accentuate the textures and make the viewer crave a bite.
**3. Drinks:** Drinks, like cocktails or coffee, benefit from backlighting or side lighting to highlight their transparency and create a sparkling effect. Experiment with different angles and intensities to capture the desired mood.
**4. Plated Dishes:** When photographing plated dishes, such as main courses or desserts, consider using a combination of natural and artificial lighting. Natural light can provide a soft, diffused illumination, while artificial lighting can be used to fill in any shadows or add a touch of drama.
Remember, these are just general guidelines, and each dish may require its unique lighting setup. Don’t be afraid to experiment and let your creativity shine!
Common Lighting Mistakes to Avoid
While lighting can transform your food photography, there are common mistakes that can hinder your progress. Here are some pitfalls to avoid:
**1. Harsh Shadows:** Avoid using direct, harsh light sources that create strong shadows. Shadows can distract from the details of your food and make it appear less appetizing. Instead, opt for soft, diffused lighting that creates gentle shadows or use reflectors to fill in any harsh shadows.
**2. Overexposure:** Be mindful of overexposing your images, especially when shooting in bright sunlight or with powerful artificial lighting. Overexposure can wash out the colors and details of your food, resulting in a lackluster photograph. Adjust your camera settings or use exposure compensation to achieve a well-balanced exposure.
**3. Inconsistent Lighting:** Maintain consistency in your lighting setup throughout a photoshoot or a series of images. Sudden changes in lighting can create an uneven look and disrupt the flow of your portfolio. Take test shots, review your images, and make adjustments as needed to ensure a consistent look and feel.
**4. Ignoring Background and Props:** Lighting is not just about illuminating the food; it also plays a significant role in setting the mood and highlighting the background and props. Pay attention to the shadows and highlights they create, and ensure they complement the overall composition.
Editing and Post-processing Techniques for Enhancing Light in Food Photos
While getting the lighting right in-camera is essential, post-processing can further enhance the light in your food photos. Here are some editing techniques to consider:
**1. Adjust Exposure:** Use exposure adjustments to fine-tune the brightness and contrast of your image. Increase exposure to brighten up shadows or decrease exposure to add depth and drama.
**2. Enhance Highlights and Shadows:** Use tools like the highlight and shadow sliders to further refine the lighting in your image. Boosting the highlights can make y
our food appear more vibrant and fresh, while adjusting the shadows can add depth and dimension.
**3. Correct White Balance:** Sometimes, the color temperature captured in-camera may not accurately represent the natural colors of the food. Use the white balance adjustment to correct any color casts and achieve a more accurate representation of your dish.
**4. Dodge and Burn:** Dodging and burning is a technique used to selectively lighten or darken specific areas of your image. It can be used to enhance the lighting and draw attention to key elements of your food.
Remember, editing should enhance your image, not drastically alter it. Strive for a natural and true-to-life representation of your food while enhancing the lighting to create a captivating visual experience.
Conclusion
Mastering lighting in food photography is an art form that requires practice, experimentation, and a keen eye for detail. Understanding the importance of lighting, whether natural or artificial, allows you to create stunning images that capture the essence and beauty of your culinary creations.
By paying attention to the mood, color temperature, and intensity of light sources, using diffusers and reflectors effectively, and avoiding common mistakes, you can elevate your food photography to new heights. Remember to experiment, be patient, and let your creativity shine through your lens.
So the next time you’re about to capture a mouthwatering dish, take a moment to consider the lighting. Embrace the power of illumination and watch as your food photography comes alive with delectable beauty.


